Raising quail chicks requires a controlled environment that fosters their growth and development. A quail brooder is a specialized enclosure designed to provide the necessary conditions for these young birds to thrive.
The essential elements of a quail brooder setup include adequate heat, sufficient space, and proper bedding. Heat is crucial for maintaining the health and comfort of the chicks, while ample space allows them to move freely and grow. Bedding materials, such as wood shavings or paper-based products, help keep the enclosure clean and dry.
Key Takeaways
- A quail brooder provides a controlled environment for quail chicks to grow.
- Heat, space, and bedding are essential elements of a quail brooder.
- Proper temperature control is critical for the health of quail chicks.
- Adequate space allows quail chicks to move and grow.
- Bedding materials help maintain cleanliness and dryness in the brooder.
Understanding Quail Brooder Essentials
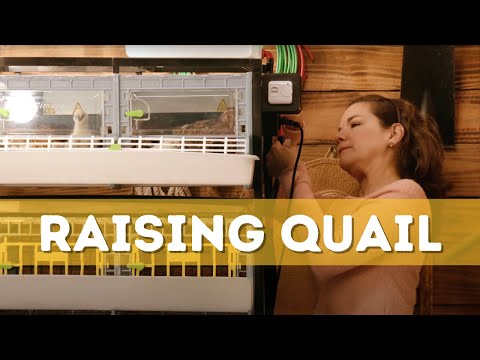
Understanding the essentials of a quail brooder is vital for anyone looking to raise these birds successfully. A quail brooder is a specialized enclosure designed to provide young quail with the necessary conditions for healthy growth and development.
What Is a Quail Brooder and Why You Need One
A quail brooder serves as a safe and nurturing environment for quail chicks, offering protection from predators, controlled temperature, and adequate space for movement. Unlike adult quail, chicks require specific care, including precise temperature control and protection from drafts, making a brooder indispensable.
Key Features of a Quail Brooder:
- Temperature control mechanisms
- Adequate ventilation
- Protection from predators
- Sufficient space for movement
- Easy cleaning and maintenance
Critical Differences Between Quail and Chicken Brooders
While both quail and chicken brooders provide a safe environment for young birds, there are significant differences in their design and operation. Quail are smaller and more delicate than chickens, requiring different space allocations and temperature controls.
| Feature | Quail Brooder | Chicken Brooder |
|---|---|---|
| Space per Chick | Less than 1 sq. ft. | About 1-2 sq. ft. |
| Temperature Requirement | Higher initial temperature, gradual decrease | Similar, but often starts slightly lower |
| Bedding Material | Pine shavings or paper towels | Often straw or wood shavings |
The Impact of Proper Brooding on Quail Health
Proper brooding practices have a significant impact on the health and survival rate of quail chicks. Adequate temperature, hygiene, and nutrition during the brooding period lay the foundation for the birds’ future health and productivity.
Benefits of Proper Brooding:
- Reduced mortality rates
- Improved growth rates
- Better disease resistance
- Enhanced overall well-being
Choosing the Right Quail Brooder for Your Needs

The right quail brooder is essential for providing a safe and nurturing environment for your quail chicks. With various options available, from commercial brooders to DIY setups, it’s crucial to understand the benefits and limitations of each.
Commercial Options: Brower Chick & Quail Brooder Review
Commercial brooders like the Brower Chick & Quail Brooder offer a ready-to-use solution with features designed specifically for quail and chicken chicks. These brooders are often praised for their durability and ease of cleaning. The Brower Chick & Quail Brooder is a popular choice among breeders due to its adjustable height and secure lid, which help prevent escapes and predation.
Plastic Tote Brooders for Small Batches
For those raising small batches of quail, plastic tote brooders can be a cost-effective and versatile option. These are easily converted into brooders by adding ventilation, a heat source, and appropriate bedding. Their compact size makes them ideal for backyard breeders or those with limited space.
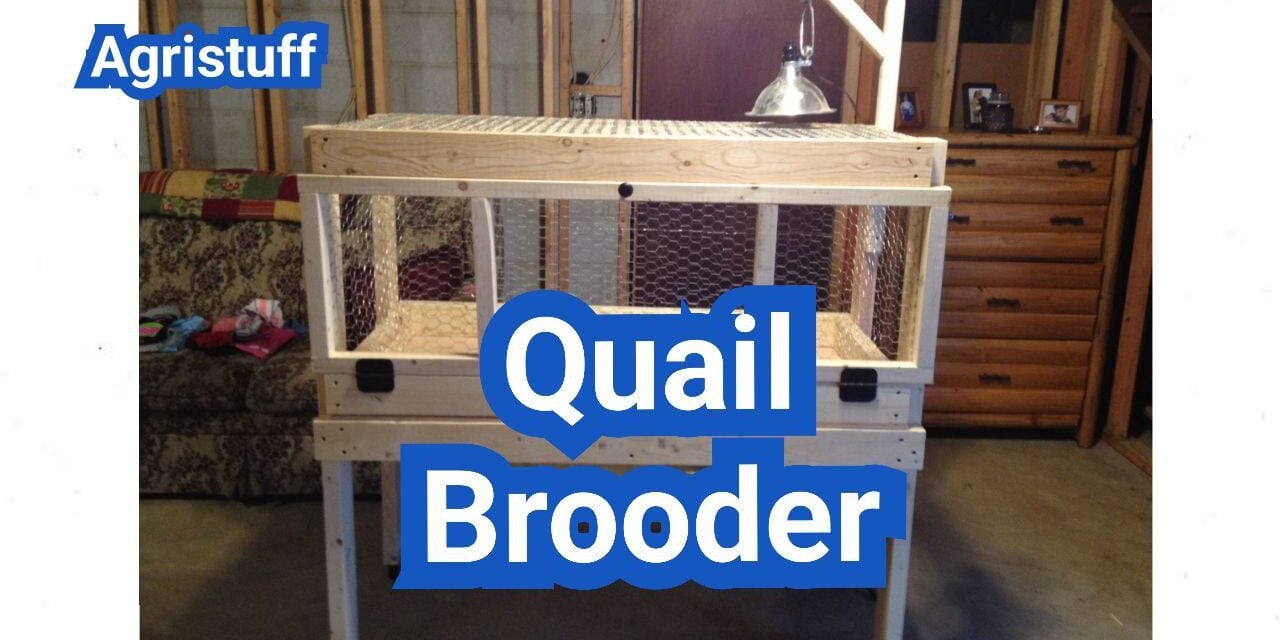
Wooden Brooder Boxes for Larger Operations
Wooden brooder boxes are another option, particularly suitable for larger operations. They can be custom-built to accommodate more chicks and can be designed with features like adjustable ventilation and easy access for cleaning. Wooden brooders are also known for their durability and can be reused multiple times.
Factors to Consider When Selecting Your Brooder
When choosing a quail brooder, several factors should be considered, including the size of your operation, the number of chicks you’re raising, and your budget. It’s also important to think about the ease of cleaning, ventilation, and the ability to maintain a consistent temperature. By weighing these factors, you can select a brooder that meets your specific needs and ensures the health and well-being of your quail chicks.
Quail Brooder Size Requirements

Determining the right quail brooder size is crucial for the healthy development of your chicks. The size of the brooder will depend on the number of quail chicks being raised.
Space Needed Per Chick: Minimum Standards
Providing adequate space per chick is essential to prevent overcrowding and ensure healthy growth. The general guideline is to provide at least 0.5 to 1 square foot per quail chick in the brooder during the first few weeks.
As a rule of thumb, it’s better to err on the side of caution and provide more space than the minimum recommended. Overcrowding can lead to stress, pecking, and other health issues in quail chicks.
Scaling Your Brooder as Quail Grow
As quail chicks grow, their space requirements change. It’s essential to scale your brooder size accordingly to accommodate their growth. Typically, quail chicks double in size within the first few weeks of life, necessitating a larger brooder.
Plan ahead by having a larger brooder ready to transfer your quail chicks to once they outgrow their initial space. This proactive approach helps in maintaining a healthy environment.
Preventing Overcrowding Issues
Overcrowding is a significant risk factor for the health and well-being of quail chicks. To prevent overcrowding, monitor the size of your quail chicks and the brooder’s capacity. Adjust the brooder size as needed to ensure there’s enough space for all chicks to move comfortably.
Regularly checking on your quail and their environment is crucial. Look for signs of overcrowding such as excessive noise, feather pecking, or stress behaviors, and take corrective action promptly.
Quail Brooder Temperature Management

Maintaining the optimal temperature in a quail brooder is crucial for the health and development of quail chicks. Temperature management is a critical factor that directly impacts their growth rate, health, and overall survival.
Week-by-Week Temperature Chart for Optimal Growth
To ensure the quail chicks grow at a healthy rate, it’s essential to follow a specific temperature regimen. Here’s a general guideline for the temperature requirements week by week:
| Week | Temperature (°F) |
|---|---|
| 1 | 95-100 |
| 2 | 90-95 |
| 3 | 85-90 |
| 4 | 80-85 |
| 5 and beyond | 75-80 |
It’s crucial to gradually decrease the temperature as the chicks grow to simulate natural conditions and prevent stress.
Signs Your Quail Are Too Hot or Too Cold
Monitoring the behavior and physical condition of your quail chicks is vital to determine if the brooder temperature is appropriate. Signs of overheating include panting, lethargy, and spreading wings away from the body. Conversely, chicks that are too cold may huddle together, be noisy, or have a decreased appetite.
Temperature Monitoring Tools and Techniques
Accurate temperature monitoring is essential. Using a reliable thermometer, preferably digital, is recommended. Place the thermometer at the level of the chicks to get an accurate reading of their environment. Regularly check the temperature, especially during the first few weeks when the chicks are most vulnerable.
Creating Temperature Gradients in Your Brooder
Creating a temperature gradient allows the chicks to move to their preferred temperature zone, helping to prevent overheating or overcooling. This can be achieved by adjusting the placement of heat sources or using different heat sources with varying temperatures. A temperature gradient gives the chicks the flexibility to regulate their body temperature.
As emphasized by quail breeders, “Providing a temperature gradient is key to ensuring the comfort and health of quail chicks.” This approach not only enhances their well-being but also promotes healthy growth and development.
Heat Lamps vs. Heat Plates for Quail Chicks

Heat lamps and heat plates are two popular heating solutions for quail chicks, each with its own set of advantages and disadvantages. The choice between these two options depends on several factors, including safety, energy efficiency, and the specific needs of your quail chicks.
Traditional Heat Lamp Setup and Safety Precautions
Heat lamps have been a traditional choice for heating quail chicks. They provide a straightforward and often cost-effective way to maintain the necessary temperatures. However, they come with certain risks, such as fire hazards if not properly installed or monitored. To mitigate these risks, it’s essential to follow safety precautions, including securing the lamp to prevent it from falling and keeping it at a safe distance from flammable materials.
Key safety measures include:
- Using a lamp with a protective guard to prevent burns
- Ensuring the lamp is securely fastened to the brooder
- Keeping the lamp at a safe distance from bedding and other materials
Modern Heat Plate Benefits and Installation
Heat plates offer a modern alternative to heat lamps, providing a safer and often more energy-efficient solution. They work by providing a warm surface for the chicks to snuggle up against, mimicking a mother’s warmth. When installing a heat plate, it’s crucial to follow the manufacturer’s instructions to ensure proper placement and temperature control.
Benefits of heat plates include:
- Reduced risk of fire compared to heat lamps
- Lower energy consumption
- A more natural heating experience for the chicks
Cost Comparison and Energy Efficiency
When comparing heat lamps and heat plates, both the initial cost and ongoing energy expenses should be considered. While heat lamps might be cheaper initially, their energy efficiency and lifespan can vary. Heat plates, although potentially more expensive upfront, often provide long-term savings through reduced energy consumption.
| Heating Option | Initial Cost | Energy Efficiency |
|---|---|---|
| Heat Lamps | Lower | Variable |
| Heat Plates | Higher | Higher |
Which Option Is Best for Different Situations
The choice between heat lamps and heat plates depends on your specific situation, including the size of your operation, the number of chicks, and your budget. For small batches, a heat plate might be more suitable due to its safety and efficiency. For larger operations, a combination of heating solutions might be necessary.
Consider the following when making your decision:
- The size and layout of your brooder
- The number of quail chicks you are raising
- Your budget for both initial setup and ongoing expenses
Best Bedding Options for Quail Chicks

The bedding material used in quail brooders plays a significant role in the well-being of the chicks. It is essential for maintaining cleanliness, controlling odor, and ensuring the chicks’ comfort.
First Week Bedding: Paper Towels and Grip Mats
For the first week, paper towels are highly recommended as bedding for quail chicks. They provide a smooth surface that prevents leg problems and are easy to clean. Alternatively, grip mats can be used as they offer traction, reducing the risk of chicks slipping and injuring themselves.
Pine Shavings and Other Absorbent Materials
After the first week, you can transition to more absorbent materials like pine shavings. Pine shavings are effective at controlling moisture and odor, making them a popular choice for quail brooders. Other absorbent materials, such as shredded paper or specific types of wood shavings, can also be used.
- Pine shavings
- Shredded paper
- Other wood shavings
Preventing Leg Problems with Proper Flooring
Leg problems in quail chicks can be mitigated by ensuring the brooder floor is covered with a material that provides adequate grip and is not too harsh on their legs. Wire mesh should be avoided as it can cause leg injuries. Instead, opt for softer materials like paper towels or grip mats initially, and then transition to pine shavings or other suitable bedding.
Bedding Materials to Avoid Completely
Certain bedding materials should be avoided entirely when raising quail chicks. These include:
- Cedar shavings, which can be toxic due to their aromatic oils.
- Sand, as it can cause respiratory issues when inhaled.
- Newspaper, because the ink can be harmful if ingested.
Choosing the right bedding is crucial for the health and well-being of quail chicks. By selecting appropriate materials and avoiding harmful ones, you can create a safe and healthy environment for your quail to grow.
DIY Quail Brooder Plans and Ideas

A DIY quail brooder allows you to provide a safe and healthy environment for your quail chicks without breaking the bank. Creating a brooder yourself can be a cost-effective and rewarding option, offering the flexibility to customize it according to your specific needs.
Simple Plastic Tote Brooder Construction
One of the simplest ways to create a DIY quail brooder is by using a plastic tote. This method is ideal for small batches of quail chicks. To construct a plastic tote brooder, you’ll need a large plastic storage bin, a heat lamp or heat plate, bedding material, and a thermometer.
- Drill ventilation holes in the top and sides of the tote.
- Install a heat source, ensuring it’s secure and can’t be knocked over.
- Add a layer of bedding material, such as pine shavings or paper towels.
- Monitor the temperature to ensure it remains within the optimal range for quail chicks.
Building a Wooden Brooder Box from Scratch
For larger operations or those preferring a more customized solution, building a wooden brooder box is a viable option. This allows for greater control over the size and features of the brooder.
To build a wooden brooder box, you’ll need:
- Wooden planks or plywood for the frame and floor.
- Nails or screws to assemble the box.
- A lid or mesh for ventilation.
- A heat source and thermometer.
Consider adding a removable top or side for easy cleaning and access to the chicks.
Repurposing Household Items for Budget Brooders
Repurposing household items is another creative way to build a quail brooder on a budget. Old dressers, storage containers, or even large cardboard boxes can be converted into functional brooders with some modifications.
| Item | Modifications Needed | Benefits |
|---|---|---|
| Old Dresser | Remove drawers, add ventilation, install heat source | Ample space, easy access |
| Large Cardboard Box | Add ventilation holes, secure heat source | Low cost, easy to set up |
| Storage Container | Drill ventilation holes, add bedding | Durable, easy to clean |
Adding Custom Features to Your DIY Brooder
Regardless of the DIY method you choose, consider adding custom features to enhance the functionality and safety of your quail brooder. These can include:
- Adjustable ventilation to control temperature and airflow.
- Easy-access doors or panels for simplified cleaning and chick management.
- Predator-proofing measures, such as secure lids or reinforced mesh.
By incorporating these DIY quail brooder plans and ideas into your quail breeding operation, you can ensure a healthy start for your quail chicks while managing costs effectively.
Setting Up Your Quail Brooder: Step-by-Step Guide

A well-set-up quail brooder is the foundation for raising strong and healthy quail. Setting up a quail brooder requires careful planning and attention to detail to ensure the well-being of your chicks.
Preparing and Sanitizing the Brooder Space
Before introducing your quail chicks to the brooder, it’s crucial to prepare and sanitize the space. Start by cleaning the brooder with a mild detergent and warm water. Rinse thoroughly to remove any soap residue. Then, sanitize the brooder using a quail-safe disinfectant. Allow the brooder to dry completely before adding bedding materials.
Installing and Testing Heat Sources
The next step is to install and test your heat source. Whether you’re using a heat lamp or a heat plate, ensure it’s securely installed and functioning correctly. For heat lamps, use a guard or protective cage to prevent chicks from coming into contact with the hot bulb. For heat plates, follow the manufacturer’s instructions for installation. Monitor the temperature closely to ensure it reaches the optimal range for your chicks.
| Age of Chicks | Optimal Temperature |
|---|---|
| 0-7 days | 95-100°F (35-38°C) |
| 7-14 days | 90-95°F (32-35°C) |
| 14-21 days | 85-90°F (29-32°C) |
Adding Appropriate Bedding Materials
Choose the right bedding material for your quail brooder. For the first week, paper towels or grip mats are recommended as they provide traction and are easy to clean. After the first week, you can switch to pine shavings or other absorbent materials. Avoid using cedar shavings as they can be harmful to your chicks.
Positioning Feeders and Waterers Correctly
Place feeders and waterers in a way that prevents chicks from getting wet or dirty. Use specialized quail feeders and waterers that are designed to minimize waste and prevent drowning. Position them in an area that is easy to access and clean.
By following these steps, you can create a safe and healthy environment for your quail chicks to grow and thrive.
Quail Brooder Ventilation Requirements
Maintaining optimal ventilation in quail brooders is essential for the respiratory health of the chicks. Proper airflow helps remove moisture, reduce ammonia levels, and prevent the buildup of harmful pathogens.
Importance of Fresh Air for Respiratory Health
Fresh air is crucial for the health and development of quail chicks. Inadequate ventilation can lead to respiratory problems, which can significantly impact the overall health and growth rate of the chicks. Ensuring a constant supply of fresh air helps to maintain a healthy environment within the brooder.
Creating Ventilation Without Harmful Drafts
While ventilation is important, it’s equally crucial to avoid creating harmful drafts that can chill the chicks. Adjustable vents or windows can help achieve a balance between providing fresh air and maintaining a stable temperature. This can be accomplished by opening vents at the top of the brooder to allow warm, moist air to escape while drawing in fresh air from the bottom.
Signs of Poor Air Quality in Your Brooder
Monitoring the air quality within the brooder is vital. Signs of poor air quality include condensation on the walls or lid of the brooder, a strong ammonia smell, and visible dust or dirt. Addressing these issues promptly can prevent health problems among the quail chicks.
Seasonal Adjustments to Ventilation
The ventilation needs of your quail brooder may vary with the seasons. During warmer months, more ventilation may be necessary to prevent overheating, while in colder months, it’s essential to balance ventilation with the need to maintain warmth. Regularly checking and adjusting the ventilation system ensures that the brooder remains a healthy environment for the quail chicks throughout the year.
Quail Chick Feeder and Waterer Solutions

Quail chick feeders and waterers play a vital role in preventing drowning and reducing waste. Providing the right equipment is crucial for the health and development of your quail chicks.
Preventing Drowning with Specialized Waterers
One of the primary concerns with quail chicks is preventing drowning in waterers. Specialized quail chick waterers are designed with shallow depths and narrow openings to minimize this risk. These waterers often come with marbles or small rocks at the surface to prevent chicks from landing in the water.
Feeder Types That Reduce Waste and Contamination
Quail chick feeders come in various designs, each with its benefits. Tube feeders are popular as they reduce waste by allowing chicks to peck at food without spilling it. Other designs include tray feeders and hopper feeders, which can be adjusted as the chicks grow.
DIY Feeder and Waterer Options
For those on a budget or looking for a creative project, DIY feeder and waterer options are available. Using household items like plastic containers or wooden crates, you can create effective feeding and watering systems. The key is to ensure they are clean, accessible, and safe for the chicks.
Proper Positioning of Food and Water Sources
The placement of feeders and waterers within the brooder is critical. They should be positioned to prevent contamination from droppings and to encourage even distribution among the chicks. Regular cleaning and refilling are also essential to maintain hygiene and ensure the chicks have constant access to food and water.
Quail Brooder Safety Features

Ensuring quail brooder safety is paramount for the health and survival of your chicks. A well-designed brooder not only promotes healthy growth but also protects your quail chicks from various hazards.
Round Corner Guards to Prevent Piling
One of the critical safety features in a quail brooder is the incorporation of round corner guards. Sharp corners can lead to piling, where chicks crowd into a corner and suffocate. Round corner guards help prevent this tragic occurrence by providing a smooth, curved surface that discourages chicks from gathering in corners.
Predator-Proofing Your Brooder Setup
Predator-proofing is another essential aspect of quail brooder safety. Quail chicks are vulnerable to predators such as rats, snakes, and other animals. Ensuring that the brooder is secure and cannot be accessed by predators is crucial. This can be achieved by using sturdy materials for the brooder and ensuring that there are no gaps or weaknesses that predators can exploit.
As quail expert John Smith once said, “A secure brooder is the first line of defense against predators.”
“The safety of your quail chicks begins with a well-designed, predator-proof brooder.”
Electrical Safety for Heat Sources
Electrical safety is also a significant concern, particularly when using heat lamps or heat plates. It’s essential to ensure that all electrical components are safely installed and out of reach of the chicks. Using GFCI-protected outlets and keeping cords organized can prevent electrical shocks and fires.
Preventing Escapes with Secure Lids
Finally, preventing escapes is vital. Quail chicks can easily fly out or escape through openings if the brooder is not properly secured. Using a secure lid or mesh that prevents escape while allowing for ventilation is essential. This not only keeps the chicks safe inside but also prevents predators from getting in.
By incorporating these safety features, you can significantly reduce the risks associated with raising quail chicks in a brooder, ensuring a healthy and thriving flock.
Daily Quail Brooder Maintenance Routine
Maintaining a quail brooder daily is crucial for the health and well-being of your chicks. Regular maintenance ensures a clean environment, reduces the risk of disease, and promotes healthy growth.
Morning and Evening Check Procedures
Establishing a morning and evening check routine is vital for monitoring the condition of your quail brooder. In the morning, check the temperature, ensure that feeders and waterers are clean and filled, and inspect the brooder for any signs of damage or wear. In the evening, repeat these checks and add any necessary bedding or remove soiled bedding.
| Check Time | Tasks |
|---|---|
| Morning | Check temperature, inspect feeders and waterers, look for brooder damage |
| Evening | Repeat morning checks, add or remove bedding as needed |
Cleaning and Refilling Feeders and Waterers
Cleaning and refilling feeders and waterers daily is essential to prevent bacterial growth and keep your chicks healthy. Use a mild detergent and warm water to clean these items, and ensure they are thoroughly rinsed and dried before refilling.
Spot-Cleaning Wet or Soiled Bedding
Spot-cleaning wet or soiled bedding daily helps maintain a dry and clean environment. Remove any wet or dirty bedding and replace it with fresh, dry material to prevent ammonia buildup and reduce the risk of health issues.
Monitoring Chick Behavior and Health
Monitoring your chicks’ behavior and health daily is crucial for early detection of any potential issues. Look for signs of illness, stress, or injury, such as labored breathing, lethargy, or visible wounds. Consult a veterinarian if you notice any unusual behavior or symptoms.
By following this daily maintenance routine, you can ensure a healthy and thriving environment for your quail chicks.
Quail Brooder Cleaning and Disinfection
Maintaining a clean quail brooder is crucial for the health and well-being of your quail chicks. Regular cleaning and disinfection help prevent the spread of diseases and keep the environment healthy for the chicks to grow.
Weekly Deep Cleaning Protocol
A weekly deep cleaning is essential to remove soiled bedding, clean feeders and waterers, and disinfect all surfaces. Start by removing the quail chicks to a safe area, then take out all the bedding material and dispose of it properly.
Steps for Weekly Deep Cleaning:
- Remove and dispose of soiled bedding
- Clean feeders and waterers thoroughly
- Wipe down all surfaces with a safe disinfectant
- Replace with fresh, dry bedding material
Safe Disinfectants for Quail Environments
Choosing the right disinfectant is critical to ensure the health and safety of your quail chicks. Opt for disinfectants that are specifically labeled as safe for poultry environments.
“When selecting a disinfectant, always read the label to ensure it is suitable for use around poultry and follows the manufacturer’s instructions for dilution and application.”
| Disinfectant Type | Safety for Quail | Effectiveness |
|---|---|---|
| Quaternary Ammonium Compounds | Yes, when used as directed | Effective against a broad spectrum of pathogens |
| Hydrogen Peroxide | Yes, in diluted form | Effective against bacteria and viruses |
| Bleach | Yes, when properly diluted | Effective but requires careful handling |
Complete Sanitization Between Batches
Between batches of quail chicks, it’s crucial to perform a complete sanitization of the brooder. This involves thorough cleaning followed by disinfection and allowing the brooder to dry completely before introducing new chicks.
Managing Ammonia Levels and Odor Control
High ammonia levels can be harmful to quail chicks. Regular cleaning and proper ventilation help manage ammonia levels. Additionally, using bedding materials that absorb moisture well can reduce odors.
Tips for Managing Ammonia and Odor:
- Ensure good ventilation in the brooder
- Use absorbent bedding materials
- Clean the brooder regularly
Coturnix Quail Brooding Special Considerations
Understanding the special considerations for Coturnix quail brooding is crucial for their health and development. Coturnix quail, known for their rapid growth rate, require specific conditions to thrive during the brooding phase.
Breed-Specific Temperature Requirements
Coturnix quail chicks have specific temperature requirements that differ from other quail breeds. During the first week, they require a temperature of around 95-100°F (35-38°C). It’s essential to gradually decrease the temperature by 5°F (3°C) each week until it reaches 70-75°F (21-24°C) by the fourth week. Monitoring the temperature closely is vital to prevent overheating or chilling.
Rapid Growth Rate Management
The rapid growth rate of Coturnix quail means they need a nutrient-rich diet and adequate space to prevent overcrowding. Providing a starter feed with a high protein content (around 28-30%) is crucial during the initial weeks. As they grow, ensuring enough space in the brooder is critical to prevent stress and health issues.
Common Health Challenges with Coturnix Chicks
Coturnix quail chicks are prone to certain health challenges, including pasty vent and respiratory issues. Maintaining a clean brooder and ensuring proper ventilation can mitigate these risks. Regular monitoring of the chicks’ health and behavior is essential for early detection of any potential issues.
Transitioning Fast-Growing Coturnix to Adult Housing
Due to their rapid growth rate, Coturnix quail need to be transitioned to adult housing relatively quickly. This transition should be done gradually, ensuring that the chicks are fully feathered and accustomed to the adult environment. Providing a stress-free transition is key to maintaining the health and well-being of the quail.
How Long to Keep Quail Chicks in the Brooder

The brooder period for quail chicks is a critical phase that requires careful consideration of age, health, and environmental factors. Quail chicks need to be kept in the brooder for a specific duration to ensure they grow strong and healthy before being moved to outdoor housing.
Age-Based Guidelines for Different Quail Breeds
Different quail breeds have varying growth rates, which influence how long they should be kept in the brooder. For instance, Coturnix quail chicks grow rapidly and can be moved out of the brooder sooner than other breeds.
Generally, quail chicks are kept in the brooder for about 4 to 6 weeks. However, this can vary based on the breed and individual development.
| Quail Breed | Brooder Duration (weeks) |
|---|---|
| Coturnix Quail | 4-5 |
| Button Quail | 5-6 |
| Bobwhite Quail | 5-6 |
Physical Signs of Readiness to Transition
Besides age, there are physical signs that indicate quail chicks are ready to be moved out of the brooder. These include fully developed feathers, the ability to regulate their body temperature, and active foraging behavior.
It’s essential to monitor the chicks closely and look for these signs to determine the best time for transition.
Weather Considerations for Outdoor Transitions
Weather plays a significant role in deciding when to move quail chicks outdoors. Mild temperatures and dry weather are ideal for transitioning.
Extreme weather conditions, such as very cold or hot temperatures, should be avoided when moving the chicks to outdoor housing.
Gradual Transition Techniques for Reduced Stress
To minimize stress when moving quail chicks from the brooder to outdoor housing, a gradual transition is recommended. This can involve initially placing the chicks in an outdoor aviary or enclosure adjacent to the brooder.
Gradually increasing their time outdoors helps the chicks acclimate to new conditions, reducing the risk of stress and health issues.
Troubleshooting Common Quail Brooder Problems
Quail chicks can be prone to various health issues, making it essential to identify and address brooder problems promptly. Effective troubleshooting is key to ensuring the health and well-being of your quail chicks. In this section, we will explore common issues that may arise in a quail brooder and provide practical solutions.
Addressing Leg Issues and Splayed Legs
Leg problems, including splayed legs, are common in quail chicks due to their rapid growth rate and sensitive leg structures. Ensuring proper bedding and floor surface can help prevent these issues. Using a non-slip surface or grip mats during the first week can significantly reduce the incidence of splayed legs.
Prevention Tips:
- Use paper towels or grip mats for the first week.
- Avoid wire mesh flooring.
- Provide adequate space to prevent overcrowding.
Managing Pasty Vent and Digestive Problems
Pasty vent, a condition where feces clogs the vent area, can be life-threatening if not addressed. Keeping the brooder clean and ensuring proper hydration are crucial steps in managing this issue.
Key Management Strategies:
- Monitor chick hydration and provide fresh water.
- Maintain a clean brooder environment.
- Adjust diet as necessary to prevent digestive issues.
Dealing with Aggressive Behavior and Pecking
Aggressive behavior and pecking can lead to injury and stress among quail chicks. Providing adequate space, enrichment, and monitoring the social dynamics within the brooder can help mitigate these behaviors.
Management Techniques:
- Increase space and add hiding places.
- Provide enrichment activities.
- Monitor for signs of stress or injury.
Emergency Procedures for Power Outages
Power outages can be particularly dangerous for quail chicks relying on heat lamps or plates for warmth. Having a backup plan, such as a generator or alternative heat source, is crucial.
| Emergency Measure | Description |
|---|---|
| Backup Heat Source | Use a generator or alternative heating method. |
| Insulation | Ensure the brooder is well-insulated to retain heat. |
| Monitoring | Closely monitor chick behavior and temperature. |
Raising Healthy Quail Through Proper Brooding
Raising healthy quail requires careful attention to their early stages of development, particularly during the brooding period. Proper brooding practices are essential for ensuring that quail chicks grow into robust and healthy adults.
By understanding the specific needs of quail chicks, including appropriate temperature management, sufficient space, and suitable bedding, you can create an optimal environment for their growth. The guidelines provided in this article have highlighted the critical aspects of quail brooding, from choosing the right brooder to managing ventilation and maintaining cleanliness.
Implementing these best practices will significantly improve the health and survival rate of your quail chicks. As you continue to raise your quail, remember that proper brooding is the foundation upon which their future health and productivity are built. By focusing on raising healthy quail through proper brooding practices, you can enjoy a thriving and productive flock.
FAQ
What is a quail brooder, and why is it necessary for raising quail chicks?
A quail brooder is a controlled environment designed to provide quail chicks with the necessary heat, space, and care during their early stages of development. It’s essential for u003cstrongu003eraising healthy quailu003c/strongu003e as it protects them from predators, provides optimal conditions for growth, and helps prevent diseases.
What are the key differences between quail and chicken brooders?
Quail brooders are typically smaller and require more precise temperature control compared to chicken brooders. Quail chicks grow faster and have different space requirements, so the brooder needs to be scaled accordingly.
How do I choose the right quail brooder for my needs?
When selecting a quail brooder, consider factors such as the number of chicks you’re raising, available space, ventilation requirements, and your budget. You can opt for commercial brooders or DIY setups, depending on your specific needs and preferences.
What is the ideal temperature for a quail brooder, and how do I manage it?
The ideal temperature for quail chicks starts at around 95-100°F (35-38°C) in the first week and decreases by 5°F (3°C) each subsequent week until they are fully feathered. You can use heat lamps or heat plates and monitor the temperature using thermometers to ensure optimal conditions.
What are the best bedding options for quail chicks, and how can I prevent leg problems?
Suitable bedding options for quail chicks include paper towels, pine shavings, and other absorbent materials. To prevent leg problems, ensure the bedding is not too slippery or too deep, and provide a non-slippery surface for the chicks to walk on.
How often should I clean and disinfect the quail brooder?
It’s recommended to perform a weekly deep cleaning of the quail brooder, removing soiled bedding, u003cstrongu003ecleaning feeders and waterersu003c/strongu003e, and disinfecting all surfaces with a safe disinfectant. Daily spot-cleaning is also necessary to maintain a clean environment.
How long should quail chicks stay in the brooder?
The duration quail chicks stay in the brooder depends on factors such as breed, growth rate, and weather conditions. Generally, Coturnix quail can be transitioned to outdoor housing around 4-5 weeks of age, while other breeds may take longer.
What are some common problems encountered in quail brooders, and how can I troubleshoot them?
Common issues in quail brooders include leg problems, u003cstrongu003epasty ventu003c/strongu003e, digestive issues, and u003cstrongu003eaggressive behavioru003c/strongu003e. To troubleshoot these problems, ensure proper bedding, monitor temperature and humidity, provide adequate space, and adjust feeding and watering systems as needed.
Can I use a chicken brooder for quail chicks?
While it’s possible to use a chicken brooder for quail chicks, it’s not always ideal due to differences in size, temperature requirements, and space needs. Quail-specific brooders or adjustments to the chicken brooder may be necessary to ensure optimal conditions.
How can I ensure proper ventilation in the quail brooder?
To ensure proper ventilation, provide adequate airflow by adjusting vents or windows, and monitor for signs of poor u003cstrongu003eair qualityu003c/strongu003e, such as ammonia buildup or excessive moisture. Seasonal adjustments may be necessary to maintain optimal ventilation.
How long should I keep chicks in a quail brooder?
Most chicks stay in a quail brooder until they are well-feathered and holding body heat reliably, which depends on species, room conditions, and management consistency. If chicks still crowd the warm zone at night, they likely need more time or better draft control before moving out. u003ca href=u0022https://poultrybiosecurity.org/files/Self-Assessment-Checklist-for-Enhanced-Poultry-Biosecurity.pdfu0022u003esmall-flock management and planning checklistu003c/au003e.
Do I need a special disease plan for a quail brooder?
A quail brooder disease plan can be simple: limit traffic, keep equipment dedicated to the brooder, clean between batches, and pay attention to unusual behavior or sudden losses. When disease risk is elevated in your area, strengthen biosecurity and avoid contact with outside birds and contaminated footwear. u003ca href=u0022https://www.aphis.usda.gov/sites/default/files/biosecurity-workbook.pdfu0022u003eUSDA biosecurity planning workbooku003c/au003e.
Why are my chicks piling in the quail brooder?
Piling in a quail brooder usually signals chilling, drafts, fear/startle events, or corners that encourage crowding. Fix drafts at chick level, round corners, ensure an even heat gradient, and keep disturbances low—especially at dusk and overnight. u003ca href=u0022https://www.cdc.gov/salmonella/outbreaks/mbandaka-05-01/index.htmlu0022u003epublic health guidance related to poultry handling and hygieneu003c/au003e.
What should I do if the power goes out while using a quail brooder?
A power outage plan for a quail brooder should prioritize safe heat continuity, monitoring, and preventing dangerous improvisation (like open-flame heaters in enclosed spaces). Keep a simple emergency kit (insulation, safe backup heat option, thermometer), and consider how you would maintain temperature for the first critical hours. u003ca href=u0022https://www.fda.gov/food/buy-store-serve-safe-food/food-and-water-safety-during-power-outages-and-floodsu0022u003efood and water safety during power outagesu003c/au003e.
Conclusion of: Quail Brooder
What a quail brooder must do in the first 3 weeks
A quail brooder is essentially a controlled “micro-room” that replaces what a mother bird would provide: steady warmth, protection from drafts, and a clean surface that tiny legs can grip. Because quail chicks are small and lose heat fast, the brooder has to be more consistent than many people expect, especially during the first week. brooding basics for young chicks.
A quail brooder also has to manage behavior, not just temperature, because quail chicks can pile into corners, get smothered, or chill in minutes if airflow is wrong. The goal is simple: keep chicks evenly spread, active, and eating—then expand space as they grow rapidly from “bumblebee-sized” to feathering out. raising quail management guide.
Pick the right brooder container and location
A quail brooder can be a large plastic tote, a stock tank, a wire dog crate with solid sides added, or a custom plywood box—what matters is smooth draft control and easy cleaning. Place it in a low-traffic indoor area (garage, mudroom, heated outbuilding) where you can keep temperatures stable and avoid sudden cold air from doors. guidance on quail care and housing.
A quail brooder location should also be practical: access to power, safe distance from flammables, and a spot where you can see chicks multiple times per day without “opening the lid” for long. If you can’t comfortably stand there and observe quietly for 60–90 seconds, you’ll miss the early signs that something is off. brooding setup and early care tips.
Heat: temperature targets and a week-by-week plan
A quail brooder heat plan starts with safety: secure fixtures, stable stands, and no cords where water can drip or be pecked later. Use a GFCI outlet if possible, keep heat sources away from bedding, and treat “fire prevention” as part of chick survival—not a separate topic. safe brooding and heat source guidance.
If you choose a heat lamp for a quail brooder, manage risk like a pro: use a ceramic socket, two independent hang points (chain + backup wire), and a sturdy guard so the bulb can’t fall into bedding. Many brooder losses happen from a single-point failure, so build redundancy into the setup from day one. heat lamp risk management practices.
A practical quail brooder temperature target is “warm at chick level,” not warm in the room, so measure where chicks live—right on the bedding under and around the heat zone. Start warm for newly hatched chicks, then reduce heat gradually as feathering improves, using behavior (even spread, active feeding) as your truth test. temperature targets and brooding guidelines.
To make a quail brooder easier to control, create a warm zone and a cool zone rather than trying to heat the entire container evenly. That temperature gradient lets chicks self-regulate: they’ll nap in warmth, then move out to eat and drink without overheating. how brooders support chick thermoregulation.
Cold stress in a quail brooder can show up fast as huddling, loud distress peeping, and “piling” that leads to smothering; heat stress shows as panting, splayed wings, and chicks avoiding the heat source. If you adjust anything, do it in small steps, then observe again after 10–15 minutes before changing more. environmental factors to manage during brooding.
Space and layout: prevent piling, drafts, and escapes
A quail brooder needs enough floor space that chicks can spread out in a loose “donut” pattern around the warm zone, not stack on each other. Crowding increases stress, reduces access to feeders and drinkers, and makes wet spots appear faster—so plan to expand space or split groups as chicks grow. space planning principles for quail-type birds.
Shape matters in a quail brooder because corners invite piling, especially at night or after a scare. Rounding corners with cardboard arcs or using a circular brooder guard for the first several days can reduce losses and keeps chicks circulating instead of compressing into a wedge. small-flock brooding and management guidance.
Feeder and drinker placement in a quail brooder should create “multiple access points” so timid chicks aren’t pushed away. Use at least two feeding stations for larger batches, keep water slightly away from the warmest spot to avoid humidity spikes, and keep pathways open so chicks don’t have to climb over each other. brooder layout and management considerations.
A quail brooder must be escape-proof as soon as chicks can hop, which can happen earlier than many first-timers expect. Use a secure lid with good airflow, avoid wide gaps, and ensure the top material won’t snag toes or allow heads to get stuck as birds grow.
Bedding and footing: keep it dry, clean, and grippy
The biggest bedding job in a quail brooder is traction: slick surfaces lead to leg strain and “spraddle” issues, especially in the first week. For the first 24–48 hours, many keepers use paper towels over an absorbent base so chicks can learn to walk and find feed without sliding. brooder flooring and early care recommendations.
Once chicks are steady, a quail brooder typically does best with dry pine shavings or similar absorbent litter that can be spot-cleaned daily. Avoid aromatic cedar, avoid dusty material, and prioritize whatever stays dry the longest in your climate and indoor humidity.
Wet litter is a quail brooder problem you should treat immediately because moisture drives ammonia and foot irritation, and it also makes chicks lose heat faster. Create a habit of “wet-spot patrol” at least twice daily—especially around drinkers—and replace wet bedding rather than trying to stir it in. litter management factors and moisture control.
Preheating helps a quail brooder stay dry because warm surfaces evaporate moisture instead of letting condensation build up in bedding. Run your heat source long enough that the bedding and floor beneath it are warm before chicks arrive, then keep waterers level and stable to minimize spills. how preheating affects litter drying.
Feed and water setup for tiny chicks
In a quail brooder, use a high-protein starter designed for game birds or quail chicks, and keep it available at all times during early growth. Use shallow feeders at first, refresh feed frequently, and avoid letting feed get damp or caked near water stations. feeding quail starter and management notes.
Because quail chicks are small, a quail brooder water setup should prevent drowning and chilling. Use a chick-safe waterer with a narrow trough, add marbles or clean pebbles to open dishes if you must use them, and place water so chicks can reach it without standing in it. game bird feeding and watering considerations.
Sanitation in a quail brooder starts at the drinker because warm, dirty water becomes a fast-growing problem. Wash and refill waterers daily (more often if bedding is dusty), keep a simple handwashing routine after handling birds, and limit “visitor hands” around chicks. CDC guidance for healthy handling of backyard poultry.
Ventilation and air quality without chilling
A quail brooder needs fresh air exchange to prevent moisture and odor buildup, but airflow should never create a direct draft at chick level. Think “gentle, steady ventilation” rather than a fan pointed at the brooder, and use solid sidewalls or draft shields if the room has moving air. minimum ventilation concepts in cooler weather.
Floor temperature matters in a quail brooder because chicks contact the bedding constantly, so a cold floor can chill birds even when the air seems warm. If you brood in a garage or shed, consider insulating beneath the brooder or raising it off concrete, and always evaluate comfort by chick behavior, not by thermostat alone. notes on cold stress and environmental control.
Humidity management in a quail brooder is mostly spill management plus ventilation: fewer spills, faster drying, and a stable heat gradient reduce respiratory irritation and bedding breakdown. If you smell ammonia or feel your eyes sting, treat it as an emergency signal to clean and dry the brooder environment immediately. brooder environment and management overview.
Biosecurity and sanitation between batches
Even a small quail brooder benefits from a simple biosecurity routine: limit contact with outside birds, keep dedicated shoes for the brooding area, and avoid sharing equipment with other flock owners. If your region is dealing with bird disease activity, tighten traffic and keep wild birds away from feed storage and bedding. USDA checklist for protecting poultry from HPAI.
Cleaning a quail brooder correctly means removing organic material first, then washing, then disinfecting, because disinfectant does not work well on dirty surfaces. Between batches, remove all bedding, scrub the brooder and accessories, dry thoroughly, and then reset with clean litter and sanitized equipment before new chicks arrive. cleaning and disinfecting enclosure checklist.
Quick checklist
- Choose a brooder container with solid sides and a secure, ventilated lid.
- Set up a warm zone and a cool zone so chicks can self-regulate.
- Measure temperature at chick level, not at room height.
- Use safe, stable heat mounting with backup support (especially for lamps).
- Round corners or use a brooder guard to prevent piling.
- Provide multiple feeder and drinker access points for larger groups.
- Use grippy starter flooring (paper towels first, then clean absorbent litter).
- Spot-clean wet litter at least twice daily, especially around drinkers.
- Maintain gentle ventilation without drafts at chick level.
- Keep a simple daily routine: observe, clean, refresh feed/water, observe again.
Common mistakes to avoid
- Overheating the entire brooder: Build a gradient instead so chicks can move to comfort.
- Drafts at chick height: Block airflow at floor level even if the room feels fine to you.
- Slick flooring early on: Provide traction immediately to protect legs and balance.
- One feeder/waterer for a big group: Add stations to reduce crowding and “bully” losses.
- Water spills left for “later”: Wet litter quickly becomes an ammonia and chilling problem.
- Heat lamp hung by one hook: Always use two independent supports and a guarded fixture.
- Not securing the lid: Quail can hop out early, and escapes can lead to chilling and injury.
- Skipping true cleaning between batches: Remove organic material first, then disinfect.
- Too much handling in the first days: Observe quietly and handle only when necessary.
Costs and ROI snapshot
The main cost drivers for a quail brooder are the heat system (lamp, plate, or heater), electricity, bedding volume, feeders/drinkers, and replacement supplies like bulbs or sanitizer. For small U.S. setups, the most controllable “hidden cost” is waste—feed lost to spillage, bedding lost to chronic water leaks, and chick loss from preventable piling or chilling. framework for estimating poultry enterprise costs.
The ROI of a quail brooder improves when it produces uniform, fast-growing birds with low early mortality, because uniformity reduces feed waste and makes later housing and management simpler. If you sell birds or eggs, track per-bird cost from day 1 (heat + bedding + feed) and compare it to your target market price so you know whether scaling up, improving equipment, or tightening routines will pay off. example budgeting approach for small flocks.
Final thought
A quail brooder doesn’t have to be complicated, but it does have to be intentional: safe heat, smart layout, dry bedding, and calm, consistent routines are what turn tiny chicks into strong, uniform growers. If you build the brooder around chick behavior—and adjust quickly when behavior changes—you’ll prevent most common losses before they happen. preparedness mindset for poultry health and risk.
Sources & References
- Natural Disaster Preparedness for Poultry Producers (University of Maryland Extension)
- Emergency Power for Poultry Production (Auburn University)
- Preparing Your Livestock Operation for a Power Outage (Wisconsin DATCP)
- Manure and Litter Management for Biosecurity (poultrybiosecurity.org)
- Poultry Litter Management Inside and Outside the House (University of Tennessee)
- Poultry Industry Manual (USDA APHIS)
- NAHMS Poultry 2025 Small Enterprise Study Launch (USDA APHIS)
- Potential Disinfectants for Viral Poultry Disease Settings (USDA APHIS)
- Cleaning and Disinfecting Your Poultry House (Cornell Small Farms)
- Salmonella Outbreak Info Linked to Backyard Poultry (CDC)
- CDC Release on Backyard Poultry and Salmonella Prevention
- Keep Your Food Safe During Emergencies (USDA FSIS)
- Poultry Farm Biosecurity Is Crucial (Purdue Extension)
- What to Do During a Power Outage (CDC)
- Cleaning and Disinfection Guidelines (USDA APHIS)


