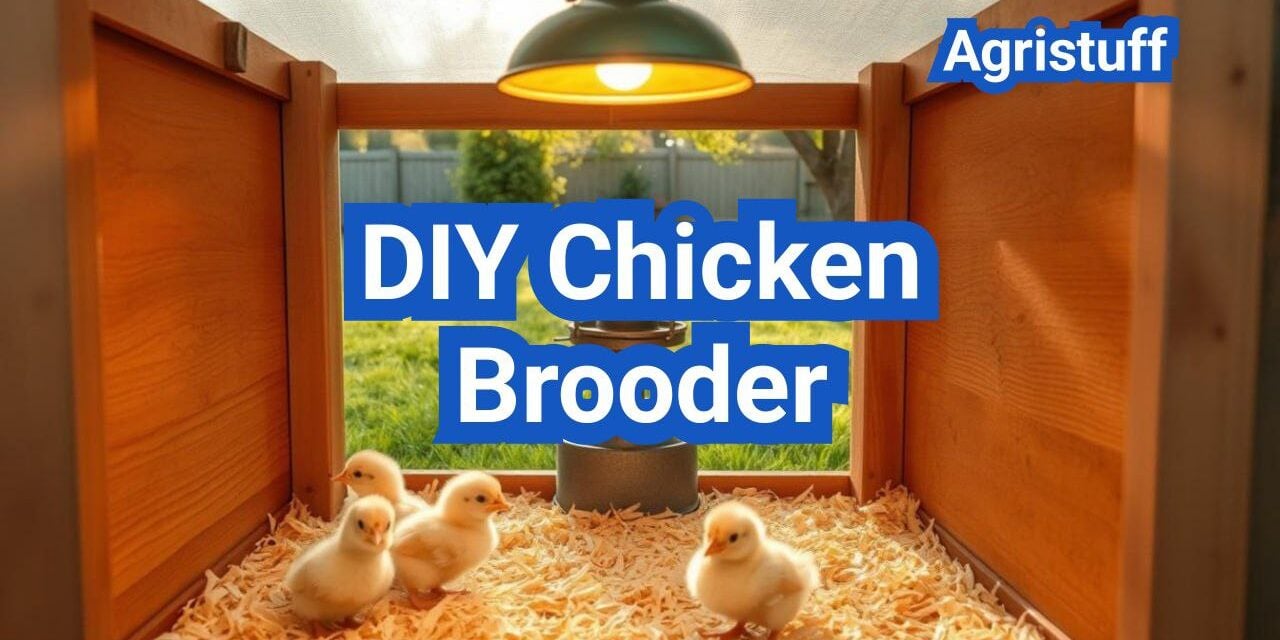
Ready to raise healthy young birds without spending a lot? This guide shows simple, low-cost builds that keep baby chicks warm, dry, and protected in DIY chicken brooder. You’ll learn practical options like a large plastic tote (about 36x18x18 inches), a used crate, a stock tank, or a yard cart that can house roughly 5–8 chicks when managed well.
Safety and proper heat management are the top priorities here, not looks. The page walks through a clear temperature schedule, the trade-offs between a heat lamp and a heat plate, and simple predator-proofing checks using common materials like hardware cloth and zip ties.
Goal: help you build an inexpensive, easy-to-clean setup using household or secondhand items. Success means chicks stay warm, food and water stay cleaner, and the enclosure stays secure from pets and predators.
Key Takeaways
- Use a 36x18x18 plastic tote for a cheap, beginner-friendly option.
- Prioritize temperature control and safety over aesthetics.
- Follow a clear heat schedule and choose between lamp or plate based on safety needs.
- Keep food and water off wet bedding to reduce illness.
- Use hardware cloth and simple fasteners to predator-proof the setup.
- This guide uses °F and common US materials for backyard setups.
What a Chicken Brooder Is and Why Baby Chicks Need One

A proper brooder gives young birds a safe, warm place to grow during their most fragile weeks. In simple terms, a brooder is a contained, warm area that replaces the hen’s nest and helps baby chicks thrive.
How a brooder mimics a mother hen
A brooder supplies steady heat, shelter, and a secure home base. This lowers stress, keeps chicks calm, and teaches them to find food and water in one spot.
Why chicks need external heat for 6–8 weeks
For about 6–8 weeks, chicks cannot regulate their body temperature. They need an external heat source until feathers grow in and they can stay warm on their own.
Core needs inside any chick brooder
- Heat: Keeps chicks from chilling and piling.
- Bedding: Dry, absorbent material to prevent illness.
- Food: Easy access to starter feed so they gain weight and grow.
- Water: Fresh, shallow water to avoid drowning and dehydration.
- Security: Protects from pets, wildlife, and drafts.
Missing any of these leads to problems: chilling, dehydration, sickness, piling, or injury. Cheap builds work well when they consistently meet these basics. The rest of this guide shows simple, low-cost setups that do just that.
Planning Your Setup for Space, Location, and Flock Size

Choose a location and container that balance warmth, cleanliness, and simple access for daily checks.
Indoor vs outdoor: mess, monitoring, and transition
Indoor setups are easier to monitor and keep warm, but they bring dust and bedding into the home. Use a garage or utility room if household mess is a concern.
Outdoor boxes help chicks acclimate to life near the coop and reduce indoor cleanup. If placed outside, plan for full predator protection on all sides, including the bottom.
Size and reachability | DIY Chicken Brooder
Choose a box large enough for feeding and movement, yet small enough that you can reach the bottom without strain. Proper access saves time when cleaning wet bedding or checking a chick.
Ventilation without drafts
Fresh air matters, but drafts at chick level are dangerous. Aim for vents or a ventilated top that move air above the birds while keeping wind off the floor.
- Location tips: home utility area for warmth, barn or porch for lower mess.
- Security: plan six-sided protection if outside—top, bottom, and all walls.
| Factor | Indoor | Outdoor | Best Practice |
|---|---|---|---|
| Warmth | Higher, easier to maintain | Lower, needs insulation | Use heat source with guard |
| Mess & Dust | Higher impact on home | Lower indoor mess | Pick a garage or protected area |
| Predator Risk | Low | High (includes bottom) | Secure six sides with hardware cloth |
| Access | Easy reach | Depends on box size | Keep box size manageable for hands-on care |
DIY Chicken Brooder Build Options That Stay Cheap

Simple, reused containers can become reliable brood areas with just a few tweaks. Below are low-cost options so you can pick what you already have or can score used.
Plastic storage tote for beginners
Why choose it: lightweight, easy to clean, fits indoors.
Minimum mods: cut ventilated lid opening, secure top with hardware cloth or wire, and add a heat guard.
Used crate or shipping box with scrap wood
Sturdier for garages or porches. Reinforce corners, close draft gaps, and fasten a screened top.
Galvanized stock tank or water trough
Great outdoors; raise slightly off the floor and add a covered top to block predators.
Yard cart or repurposed dog crate
Yard carts convert fast; dog crates need a secure top and weatherproofing for outside use.
When a prefabricated coop or hutch makes sense
Prefab units save time but watch the open bottom. Add a hardware cloth apron or floor to stop digging predators.
Tip: check local listings (Facebook Marketplace, Craigslist) for used totes, crates, and tanks to save money and time. These options fit apartment, garage, and barn scenarios with small changes.
Materials List for a Simple Tote Brooder with a Hardware Cloth Lid

A compact shopping list helps you convert a common plastic tote into a secure, warm home quickly.
Recommended tote size and why it works | DIY Chicken Brooder
Practical size: use a tote about 36x18x18 inches. This plastic box fits roughly 5–8 chicks and holds a feeder and waterer while keeping heat concentrated.
Top choices for the lid: strength vs. speed | DIY Chicken Brooder
- Hardware cloth — strongest option. Predator-resistant and sturdy for a removable lid.
- Chicken wire — lighter and cheaper, but less rigid and easier to bend.
- Window screen — only for short-term indoor use; not secure outside.
Tools, fasteners, and handling tips | DIY Chicken Brooder
Basic hardware and tools make the build quick:
- Box cutter or utility knife, drill (or punch/awl), measuring tape, marker.
- Fasteners: zip ties for speed; nuts and bolts for lasting durability. Zip ties are more work-efficient for a removable lid.
- Gloves for handling wire and a file or pliers to deburr sharp ends.
| Item | Why | Notes |
|---|---|---|
| 36x18x18 plastic tote | Right volume for small batches | Lightweight, easy to clean |
| Hardware cloth (1/2″ or 1/4″) | Predator-resistant lid | Attach with zip ties or bolts |
| Zip ties / nuts & bolts | Secure lid quickly or permanently | Keep extra ties on hand |
Quick tips: plan the lid opening so you can reach in by hand. Take only a short trip to the store—this list uses common hardware-store items to save time.
How to Build a Plastic Tote Chick Brooder Step by Step

Follow a simple, safe sequence to turn a common plastic tote into a reliable home for young chicks. The process uses minimal tools and finishes fast so you can focus on care.
Cut the lid opening for airflow and access | DIY Chicken Brooder
Mark a rectangle on the lid keeping at least 1.5–2 inches of plastic around the edges for strength. Place the opening slightly off-center; this reduces lid flex and makes reaching inside easier.
Cut the marked area with a utility knife or jigsaw. Smooth sharp edges with a file or sandpaper so the plastic won’t snag a cord or harm a chick.
Drill attachment holes and secure hardware cloth | DIY Chicken Brooder
Punch or drill evenly spaced holes about 1–1.5 inches apart around the cut opening. Lace the hardware cloth over the hole and fasten it using zip ties through the holes.
Tip: pull ties tight and trim excess. Bend any exposed wire ends inward and use pliers to finish so pets cannot push through gaps.
Create a safe cord pass-through for a lamp | DIY Chicken Brooder
If you use a heat lamp, cut a small slit near the tote handle for the cord. Round the slit edges with a grommet or tape to avoid abrasion.
Keep the lamp mount secure and outside the tote, and never leave a cord pinched under the lid where it can wear through.
Optional upgrades that make life easier
- Wheels: add casters to move the tote for cleaning or temp checks.
- Second tote: have a spare to swap chicks into while you deep-clean bedding.
- Raised feet: elevate the tote a few inches to improve airflow and deter pests.
Setting Up Bedding, Food Water, and Easy Access Inside the Brooder

Set up the interior so chicks can move from a warm zone to a cooler zone, with food and water placed to cut down on spills and soggy bedding.
Bedding choices and staging by age | DIY Chicken Brooder
Pine shavings work well once chicks are steady. They absorb moisture and help control odor.
Start the first few days on paper towels for traction and easy checks. Many keepers use puppy pads for quick swaps early on.
After week one, switch to pine or straw so the birds have softer footing and better insulation.
What to avoid | DIY Chicken Brooder
Do not use cedar shavings; aromatic oils can irritate respiratory tracts. Also avoid slick surfaces that lead to splayed legs and injury.
Feeder and feed setup | DIY Chicken Brooder
Place the feeder just outside the warmest spot so birds eat without crowding under the heat. Raise the feeder slightly as chicks grow to keep feed clean and reduce waste.
Starter feed can be medicated or non-medicated depending on local advice—keep it dry and replace so it stays fresh.
Water and teaching nipple drinkers | DIY Chicken Brooder
Nipple drinkers stay cleaner than open cups. To teach use: hold one chick, tap the beak to the nipple until a drop appears, and wait for it to drink.
Repeat with a few chicks so others copy. Watch afterward to ensure several chicks use the system, not just one.
- Arrange a clear warm/cool gradient.
- Keep food and water out of the heat splash zone.
- Swap bedding fast if it gets wet to stop illness.
Keeping Chicks Warm: Heat Lamp vs Heat Plate and a Temperature Schedule

Start with a clear temperature schedule and adjust by watching how the chicks behave.
Temperature guideline | DIY Chicken Brooder
Week 1: 95°F at chick level. Reduce by 5°F each week until birds are feathered (about 6 weeks).
This gives a simple plan for the first six weeks and helps you track progress over time.
Comparing heat sources
| Option | Purchase Cost | Operating Cost | Safety / Notes |
|---|---|---|---|
| Heat lamp (red bulb) | Low | Moderate | Effective, but fall & fire risk. Secure mount and protected cord required. |
| Radiant heat panel | Moderate | Lower | Efficient and safer mounted out of reach; mimics steady warmth. |
| Ceramic heat emitter | Moderate | Moderate | No light; good night-time heat but still needs secure mounting. |
| Heat plate | Moderate | Low | Mimics a hen—chicks go under. Check beneath often for hidden weak chicks. |
Practical tips and reading behavior | DIY Chicken Brooder
Secure any lamp so it cannot fall. Protect cords and keep a stable top mount to prevent accidents.
Watch the flock: tight huddling and loud peeping means too cold. Panting or moving away means too hot. Even spread means the set point is right.
Create a hot zone under the heater and a cooler zone on the far side. That gives chicks choice and reduces constant tinkering while they self-regulate.
Safety and Predator-Proofing for a Warm, Secure Brooder

Secure enclosures stop curious pets and wildlife before they cause harm. A tight setup protects chicks and gives you peace of mind. Start with a strong lid and check every fastener.
Securing the lid so cats, dogs, and wildlife can’t get in | DIY Chicken Brooder
The lid should latch or clip and resist being pushed in by a cat or knocked loose by a dog. Use straps, clips, or bolts rather than loose weights. If you must use weight, combine it with a strap so an animal can’t slide it away.
Thinking in six sides: top, bottom, and all four walls
Treat the setup as six-sided security. Outdoors, the bottom is often the weak point because predators dig. Add hardware cloth under the box and fasten it with hardware that resists pulling.
Fire prevention and secure mounting for heat lamps | DIY Chicken Brooder
Anchor any heat lamp so it cannot fall or rest on plastic. Keep the lamp at a safe distance from bedding and the top. Protect cords, use a proper clamp or hanging kit, and never let a lamp sit on the lid.
- Daily check: lid secure, heat stable, no melted plastic, dry bedding, no gaps at corners.
- Outdoor tip: place near the coop for ease of transition but not so close that predators use it as cover.
At The End of: DIY Chicken Brooder
The clearest path to success is a simple, repeatable routine that keeps chicks warm, dry, and fed. Choose a right-sized container, add a secure ventilated lid, stage bedding, and place food and water so they stay clean.
Use a consistent temperature schedule and watch behavior to fine-tune heat. A well-built chick brooder made from a tote or crate can match pricier setups when it provides warmth, dryness, ventilation without drafts, and full predator protection on all sides.
Plan for growth and cleaning time—birds outgrow cramped quarters fast. Prioritize secure mounting for any lamp and a solid bottom to stop digging predators.
Pick the option that fits your home and tools, whether a tote, stock tank, or yard cart. When chicks feather out, begin moving toward the coop and integrating them with the flock.
FAQ
What exactly is a chick brooder and why do baby chicks need one?
A brooder is a warm, secure enclosure that replaces a mother hen’s heat and protection for the first 6–8 weeks. It provides a controlled temperature, bedding, food, water, and predator protection so chicks grow strong and avoid chilling or injury.
How warm should the enclosure be and how long do I keep the heat on?
Start at about 95°F in week one and reduce temperature by 5°F each week until chicks are fully feathered, usually around 6–8 weeks. Watch behavior: huddling means too cold; panting or staying at the edges means too hot.
What are safe heat options: lamp, red bulb, heat plate, or ceramic emitter?
Heat plates offer steady radiant warmth and lower fire risk. Heat lamps and red bulbs work but need safe mounting and distance to prevent burns or fires. Ceramic emitters and radiant panels are another safe, durable option if mounted correctly.
How much space does each chick need inside the box?
Plan for roughly 0.5–1 square foot per chick at start, expanding to 2–3 square feet as they grow. Bigger space reduces stress, waste buildup, and pecking issues. Choose a container that lets you reach in easily for cleaning and feeding.
What bedding should I use and which materials should I avoid?
Pine shavings are a top choice: absorbent and low-dust. Avoid cedar shavings and slick surfaces like newspaper or smooth cardboard that cause leg problems. Puppy pads or paper towels work for day-old chicks but aren’t ideal long term.
How do I set up food and water to keep it clean and prevent drowning?
Use shallow waterers or nipple drinkers and place marbles or large stones in open dishes for very young chicks. Use a gravity feeder or trough-style feeder to reduce waste and keep feed off the bedding. Raise feeders and waterers slightly as chicks grow.
Can I make a safe brooder from a plastic tote or used crate?
Yes. A large plastic storage tote with a hardware cloth lid is affordable and easy to clean. Reinforce edges, add ventilation holes, and secure the top so pets can’t reach in. Scraps of wood and a used shipping crate also make sturdy options.
Is hardware cloth necessary on the top and how does it compare to chicken wire?
Hardware cloth is stronger and more predator-proof than chicken wire. It resists bending and biting and provides proper ventilation. Window screen rusts and won’t stop most predators, so avoid it for the lid.
How do I safely run a heat lamp cord through a tote lid?
Drill a small, smooth hole for the cord, protect edges with grommets, and use a cord clip to prevent tugging. Mount the lamp securely above the enclosure and keep flammable bedding away from the bulb. Consider a heat plate if cords worry you.
How often should I clean the bedding and change water and feed?
Spot-clean daily to remove wet or soiled areas. Replace bedding fully every 1–2 weeks or sooner if it smells or clumps. Change water and top up feed daily, cleaning containers thoroughly once a week to prevent bacteria.
What predator and pet risks should I plan for indoors and outdoors?
Indoors, secure the lid so dogs, cats, and rodents can’t access chicks. Outdoors, protect all six sides with hardware cloth, elevate the brooder, and use a secure latch. Nighttime predators require extra reinforcement and a locked shelter.
When does it make sense to move chicks to a coop or prefabricated hutch?
Move them out when they are fully feathered and can maintain body heat, typically 6–8 weeks. A prefabricated coop makes sense if you need long-term housing, weatherproofing, or a quick transition—just check ventilation, predator proofing, and space per bird.
What basic tools and fasteners do I need for a tote-with-hardware-cloth build?
You’ll need a drill, utility knife, wire cutters, a staple gun or zip ties, screws, and grommets for cord protection. These keep the build quick, secure, and easy to maintain.
Are there quick upgrades that make maintenance easier?
Add wheels or a rolling base for mobility, a second tote to swap during deep cleaning, and a raised platform to keep feed and water cleaner. A lid hinge or removable panel improves access while maintaining security.
How can I teach chicks to use a nipple drinker or trough-style setup?
Show them by dipping their beaks into the water or let one chick find it while others follow. Place a shallow water dish nearby until they consistently use the nipple system. Keep the nipple height low at first and raise it as they grow.
How long do chicks stay in a diy chicken brooder?
Most chicks need supplemental heat for several weeks, but the right timeline depends on feathering, room temperature, and chick behavior rather than a single calendar date. Plan to reduce heat gradually while watching comfort, activity, and nighttime resting patterns. Penn State Extension brooding timeline and temperature basics
Is a heat plate better than a heat lamp in a diy chicken brooder?
Heat plates can reduce fire risk and often keep chicks calmer at night, while heat lamps can warm a larger area but require strict mounting and cord discipline. Pick the option you can use safely every day, because “safer and consistent” beats “hotter and riskier.” NFPA safety considerations for heat and DIY setups
What bedding is safest in a diy chicken brooder?
Choose absorbent bedding with good traction, avoid slick surfaces, and skip strongly aromatic shavings that can irritate young birds. Dry management matters as much as the bedding type, so spot-clean wet areas daily and keep waterers stable. Iowa State Extension notes on bedding and chick care (PDF)
How do I stop the smell in a diy chicken brooder?
Odor usually means moisture and ammonia, so the fix is drying wet spots, improving ventilation above chick level, and preventing spills—not just adding more bedding on top. If your eyes or nose sting, treat it as an air-quality warning and correct it the same day. Penn State guidance on ammonia detection
Do I need special disease protection for a diy chicken brooder?
Basic biosecurity—handwashing, limiting visitors, separating age groups, and cleaning equipment—covers most small-flock risk without turning your home into a lab. If you source chicks carefully and keep the brooder dry and clean, you eliminate many common early disease triggers.
Conclusion of: DIY Chicken Brooder
Why the first two weeks make or break your flock
The biggest job of a diy chicken brooder is simple: replace a mother hen with steady warmth, dryness, and protection while chicks learn to eat, drink, and rest without stress. When that setup is right, chicks stay active, grow evenly, and you avoid the “one cold night” losses that frustrate new and experienced keepers alike. Penn State Extension brooding guidance
A diy chicken brooder also prevents the hidden problems that show up later—like slow growth, weak immune response, and bad habits such as piling in corners. If you treat brooding like a system (heat + space + sanitation), you’ll spend less time “fixing emergencies” and more time enjoying healthy birds. University of New Hampshire Extension chick brooding basics
What every brooder must provide (even the cheap ones)
The best diy chicken brooder always includes two zones: a warm zone where chicks can fully relax and a cooler zone where they can walk away to avoid overheating. This “choice” is what keeps chick behavior stable, because chicks self-regulate better than any single thermostat setting you guess once and forget. University of Georgia brooding environment factors
Every diy chicken brooder needs three non-negotiables: dry footing for traction, clean water that won’t spill into litter, and a draft-free barrier that still allows fresh air exchange. If you design around those, you can build with a tote, a stock tank, or a kennel and still get excellent results. Cornell Cooperative Extension chick brooding overview
Temperature: the easiest part to get wrong
Start your diy chicken brooder warm enough that chicks can rest quietly, because newly hatched birds cannot regulate body heat the way older juveniles can. A smart approach is to pre-warm the brooder space well before chicks arrive so the bedding and the air are stable, not cycling hot-cold every few minutes. UF/IFAS guidance on caring for baby chicks
Use chick behavior to “calibrate” your diy chicken brooder: chicks crowding the heat source and peeping sharply are usually cold, while chicks spread far away and panting can mean too hot. Keep a simple thermometer at chick level, but treat it like a tool—not the only truth—because air temperature and floor temperature can differ. Ohio State University tips for raising baby chicks
Space, layout, and the corner-crush problem
Plan space early in your diy chicken brooder, because chicks grow faster than most people expect, and tight brooders create wet litter and bullying. As a practical rule, give extra room for feeders and waterers so the “traffic” doesn’t force weaker chicks to sleep in damp spots. University of Minnesota raising chicks and pullets
A brooder ring (a simple circle made from cardboard or flexible material) helps a diy chicken brooder by removing sharp corners where chicks pile and suffocate, especially in the first week. This is one of the cheapest upgrades you can make, and it pays off when chicks startle at night or during sudden noises. University of Maine “Giving Chicks a Good Start” bulletin
Choosing heat: safe beats “hot” every time
A diy chicken brooder can use a heat lamp, a brooder plate, or another safe heat source, but the goal is consistent warmth without adding fire risk. Heat lamps work, yet they demand strict mounting discipline, because falling lamps and nearby combustibles are a common cause of coop and brooder fires. NC State Extension brooding setup guidance
If you use a heat lamp in a diy chicken brooder, treat it like a serious electrical appliance: secure it with a chain (not just a clamp), keep it away from bedding dust, and avoid placing it where curious pets or kids can bump the setup. Brooder plates often lower fire risk and reduce nighttime noise, but they still require proper placement and clearance. Texas A&M AgriLife “Making a Brooder” PDF
Fire and electrical safety (the part that saves your house)
Build your diy chicken brooder with “failure in mind”: assume something will get bumped, tugged, or tipped, and design so that nothing flammable is directly under a heat source. Use non-combustible surfaces where possible, keep cords out of walkways, and never rely on a single clamp to hold heat over bedding. NFPA fire and electrical safety reminders for DIY chicken setups
For any diy chicken brooder, avoid overloaded outlets, daisy-chained power strips, and questionable cords that heat up under load. If you need an extension cord, use one rated for the wattage, keep it as short as possible, and inspect it daily for warmth or damage. CPSC extension cord safety guidance
In cold regions, a diy chicken brooder sometimes tempts people to add space heaters or generators during outages, but carbon monoxide and indoor fire hazards rise fast when heating goes wrong. If you must use supplemental heat, follow strict winter safety practices and never run combustion devices in enclosed spaces “just for a little while.” CPSC winter heating safety tips
Cheap build #1: Storage tote brooder (fast, clean, indoor-friendly)
A clear-bin diy chicken brooder is one of the best “cheap but effective” builds because visibility improves chick monitoring, and smooth sides reduce drafts at floor level. Choose a tote big enough that you can place heat on one end and still keep feed and water on the cooler end to protect litter from turning to mud. MSU Extension tips for new chick owners
To finish a tote diy chicken brooder, create a hardware-cloth lid (or sturdy screen) for ventilation and safety, then raise the tote on blocks so you can route cords safely without pinching. Add a brooder ring for the first week if the tote has corners, and plan an “upgrade day” when chicks begin jumping and testing the lid. Kansas State Extension pullet-raising guide (PDF)
Cheap build #2: Cardboard brooder (best for emergencies only)
A cardboard diy chicken brooder can work for a short window if you manage moisture and fire risk, but it is not a long-term plan because cardboard absorbs spills, holds odors, and can fail fast if a heat source shifts. If you must use one, double-layer the base for rigidity, use thick bedding for traction, and move chicks to a safer build as soon as possible. Iowa State Extension chick and chicken care (PDF)
Cheap build #3: Stock tank brooder (durable, reusable, harder to tip)
A stock-tank diy chicken brooder shines for larger batches because it resists chewing pets, holds heat well, and cleans easily between groups. Use a rigid mesh cover, keep heat on one side, and place water so it’s not directly under the warmest area where condensation and spills create wet bedding. USDA checklist for cleaning and disinfecting poultry enclosures (PDF)
Cheap build #4: Dog kennel or playpen brooder (roomy for fast growers)
A kennel-style diy chicken brooder works well for meat birds and fast-growing breeds because you can scale space quickly while still containing bedding with a cardboard “skirt” around the lower rails. The key is draft control: cover three sides partway, leave ventilation above, and keep the warm zone away from direct airflow from vents or fans. Penn State on detecting ammonia in poultry housing
Predators, pets, and kid-proofing the brooder room
A diy chicken brooder is safest when it’s protected not only from “wild predators” but also from household risks like dogs, cats, and curious toddlers. Use a secure lid, keep the brooder off the floor if you have pets, and treat every opening as something a paw can test, especially at night.
Bedding and traction: dry feet prevent a surprising number of problems
The bedding in a diy chicken brooder should be absorbent, low-dust, and grippy, because slick surfaces can contribute to leg strain and poor footing. Many keepers use pine shavings, chopped straw, or similar materials, but you should avoid strongly aromatic options that may irritate young birds. Extension system notes on cedar and poultry bedding
Manage bedding in a diy chicken brooder like you’d manage a stable: spot-clean wet areas daily, keep waterers on a small tray, and add fresh dry bedding instead of “stirring wet spots” back into the pack. If you smell strong ammonia, you are already behind, and it’s time to dry the litter and improve airflow without creating drafts. MSU “Bringing Your Chicks Home” quick card (PDF)
Feed and water that stay clean (and don’t flood the brooder)
Set up feeders and waterers in a diy chicken brooder so chicks can reach them without climbing in, because spilled water is the fastest way to ruin litter and chill birds. Keep water slightly away from the heat source, and raise the base gradually as chicks grow to reduce scratching bedding into the water. Ohio State Extension on raising meat chickens
To reduce wet litter in a diy chicken brooder, choose waterers that are stable and sized correctly for your chick count, then refill more often instead of using one oversized container that invites tipping. If you’re unsure about nutrition basics—starter feed type, protein level by age, and when treats become appropriate—use an Extension nutrition guide rather than store advice. University of Maine Extension poultry publications hub
Ventilation without drafts: the balance most brooders miss
A diy chicken brooder should smell “like clean bedding,” not like ammonia, because ammonia irritates the respiratory tract and signals that litter moisture is too high. Improve ventilation above chick level, dry the wet spots, and reduce spills rather than pointing a fan directly at chicks. MSU notes on brooder setup and daily care (PDF)
In winter, a diy chicken brooder often gets sealed too tightly, trapping moisture that turns bedding into a damp mat even when the room feels warm. The fix is controlled air exchange—fresh air in, stale moist air out—while keeping drafts off the floor where chicks rest.
If you’re using any combustion heat near a diy chicken brooder (or brooding in a garage), treat carbon monoxide as a serious risk and prioritize safe ventilation and detector use. Carbon monoxide is odorless, and people often notice it too late because they’re focused on chick comfort instead of indoor air safety. EPA overview of carbon monoxide indoors
Cleaning and resets: how to prevent “mystery illness”
Between batches, a diy chicken brooder should be emptied completely, scrubbed, and dried before new bedding goes in, because organic material reduces disinfectant effectiveness and keeps pathogens around. A clean reset matters most when you brooded a previous group that had pasty vent, diarrhea, or unexplained slow growth. Cornell Small Farms cleaning and disinfection steps
Even during a batch, keep a diy chicken brooder cleaner by removing wet litter daily, washing waterers frequently, and keeping feed dry and covered from bedding dust. This “little-and-often” approach is easier than trying to salvage a soaked brooder on day 9 when chicks are already stressed.
Biosecurity for small flocks: simple habits that matter
A diy chicken brooder is a biosecurity checkpoint because chicks are vulnerable and your home is full of easy disease pathways (shoes, visitors, shared equipment, and even wild birds near doors). Keep chicks separated from older birds, limit handling, and wash hands after contact—especially before touching your face or kitchen items.
If kids handle chicks in a diy chicken brooder, add clear rules: no kissing birds, no eating or drinking in the brooder area, and handwashing every time. These are simple boundaries that reduce Salmonella risk and keep “fun chick time” from turning into a preventable illness.
Choose chicks for a diy chicken brooder from reputable sources with flock-health programs, because disease prevention starts before the box arrives at your door. Programs like NPIP are designed to support disease monitoring and help birds move legally and safely across states. Oregon Department of Agriculture NPIP overview
Common early health issues: what to watch before it’s urgent
In a diy chicken brooder, pasty vent, dehydration, and chilling can snowball quickly, so check chicks at least a few times daily in the first week. The fastest “triage” habit is to observe posture and movement first, then confirm that each chick can find water and rest comfortably in the warm zone. NC State Extension chick brooding troubleshooting tips
Wet litter and crowding in a diy chicken brooder raise the odds of coccidiosis pressure, especially as droppings build and chicks begin pecking and scratching more aggressively. Cleanliness, dry bedding, and appropriate starter feed choices are practical controls that fit backyard and small-farm systems. Merck Veterinary Manual overview of coccidiosis in poultry
Quick checklist
Use this quick checklist before chicks arrive so your diy chicken brooder is stable for at least 24–48 hours without “surprise fixes” on day one. A calm first day usually means fewer losses and less stress for both chicks and people. USDA cleaning and disinfecting checklist (PDF)
- Heat source mounted securely with a backup attachment (chain + clamp or equivalent)
- Warm zone on one end and a clearly cooler end (chicks can choose)
- Thermometer placed at chick height (not on the lid)
- Draft control at floor level, ventilation above chick level
- Absorbent, low-dust bedding with good traction
- Waterers stable and placed away from the hottest spot
- Feeder space sufficient so weaker chicks can eat
- Brooder ring installed for the first week (especially with corners)
- Secure lid that blocks pets/predators and prevents chick escape
- Dedicated “brooder shoes” or clean footwear policy for the area
Common mistakes to avoid
Most diy chicken brooder failures come from predictable mistakes that are easy to fix once you know what to look for, so use this list as a quick self-audit. Preventing one soaked brooder event often saves more money than any “fancier” piece of equipment. Kansas State Extension brooding and pullet-raising guide (PDF)
- Heat lamp too low: raises fire risk and overheats chicks; mount higher and watch behavior.
- Water under the heat source: creates humidity and wet litter; move water to the cooler side.
- No brooder ring: leads to corner piling; add a simple circular barrier in week one.
- Slick flooring/newspaper: can cause leg issues; use traction bedding immediately.
- Overcrowding: drives wet litter and bullying; expand space earlier than you think.
- Sealing the brooder tight in winter: traps moisture; ventilate above chick level.
- Loose cords and cheap extension setups: increases electrical risk; tidy and upgrade cords.
- Mixing chicks with older birds too soon: raises disease and injury risk; keep separation.
Costs and ROI snapshot
A diy chicken brooder can be built cheaply, but your real costs come from heat, bedding, and “do-overs” when something fails under real use. Typical budget builds use a tote/stock tank/kennel plus a heat source, and the best value often comes from spending a little more on safety (secure mounting, sturdy lid) than on aesthetics. ODA NPIP information packet (PDF)
Electricity is a real operating cost in a diy chicken brooder, especially with heat lamps that run many hours per day, and U.S. rates vary by region and season. The ROI is practical rather than flashy: fewer chick deaths, fewer stunted birds, less medication, and earlier, more uniform growth that makes your flock productive sooner. EIA Electricity Data Browser for U.S. electricity prices
If you run multiple batches per year, a diy chicken brooder that cleans fast and stores easily pays you back in time, because “reset labor” becomes your hidden expense. A durable lid, washable surfaces, and a predictable layout reduce your workload every day, which is a real return even if you never calculate it on paper. NPIP auxiliary provisions and sanitation framework (PDF)
Final thought
A diy chicken brooder doesn’t have to be expensive to be excellent, but it does have to be intentional: safe heat, dry traction, smart layout, and consistent cleaning win every time. If you build around chick behavior and everyday practicality, you’ll raise calmer, healthier birds—and you’ll enjoy the process a lot more. NC State Extension brooding takeaways
Sources & References
- NDSU Extension: Beginner’s guide to raising chickens
- University of Arkansas Extension: Tips for raising chicks
- University of Missouri Extension: Brooding and growing chicks
- University of Missouri Extension: Proper care of chicks after hatching (PDF)
- University of Maine Extension: Starting healthy chicks (Publication 2221)
- University of Maine Extension: Poultry publications library
- USDA APHIS: Standard operating procedures for cleaning and disinfection (PDF)
- USDA APHIS: Checklist for cleaning and disinfecting poultry enclosures (PDF)
- CDFA: Poultry facility biosecurity risk assessment guide (PDF)
- GovInfo: National Poultry Improvement Plan and auxiliary provisions (PDF)


