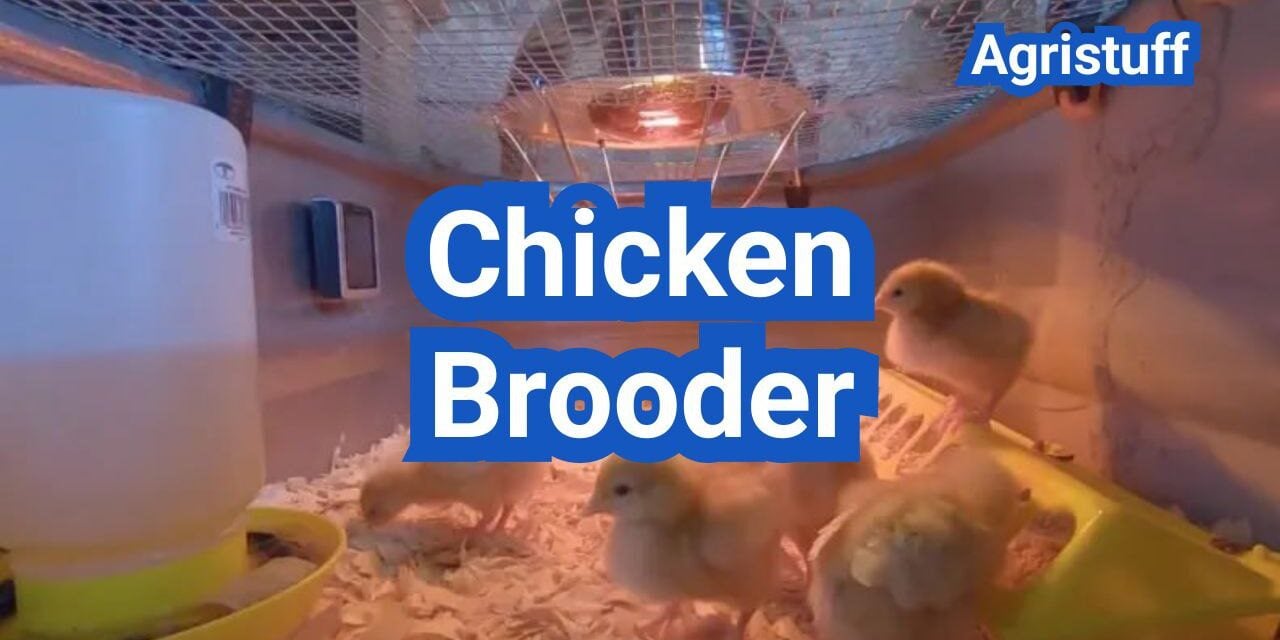
Setting up a chicken brooder is a crucial step in raising healthy chicks. Young chicks are vulnerable and require a safe and comfortable environment to grow.
A well-prepared brooder provides adequate heat, bedding, and space, which are essential for the chicks’ development. Without proper care, chicks can suffer from temperature regulation issues, fail to recognize food and water, and be more susceptible to illness.
A 14-day checklist can help ensure that all necessary steps are taken to provide the best possible start for the chicks. This includes monitoring the brooder temperature chart for chicks and choosing between a heat lamp and a brooder plate.
Key Takeaways
- Prepare a safe and comfortable environment for young chicks.
- Ensure adequate heat, bedding, and space in the brooder.
- Monitor the brooder temperature chart for optimal chick development.
- Choose the right heating option, such as a heat lamp or brooder plate.
- Use appropriate bedding, like pine shavings, for the chicks’ health.
What Is a Chicken Brooder and Why You Need One

Understanding the importance of a chicken brooder is crucial for new chicken keepers. A chicken brooder serves as a safe and controlled environment for young chicks to grow during their early stages of development.
Definition and Purpose of a Brooder
A chicken brooder is an enclosed space where chicks live until they’re fully feathered. It keeps them close to heat, food, and water while protecting them from drafts and curious pets or kids. The primary purpose of a brooder is to provide a safe haven for chicks to grow and develop before being moved to a chicken coop.
Benefits of a Properly Set Up Brooder
A properly set up brooder offers numerous benefits, including:
- Protection from predators and drafts
- Controlled temperature for optimal chick health
- Ease of access to food and water
- Reduced stress for chicks, promoting healthy growth
Setting up a chick brooder correctly is essential for the well-being of the chicks. It ensures they receive the care they need during the critical early stages of their lives.
When to Prepare Your Brooder
It’s essential to prepare your chicken brooder before the chicks arrive. This includes setting up the brooder box, installing a brooder heater, and ensuring adequate bedding material. Preparation is key to providing a smooth transition for the chicks into their new environment.
| Brooder Component | Description | Importance Level |
|---|---|---|
| Brooder Box | Enclosed space for chicks | High |
| Brooder Heater | Provides necessary heat | High |
| Bedding Material | Comfort and hygiene for chicks | Medium |
In the United States, setting up a chicken brooder is a common practice among backyard chicken enthusiasts. Whether you’re in urban or rural areas, a well-set-up brooder is vital for raising healthy chicks.
Essential Supplies for Your Chicken Brooder Setup

A well-equipped chicken brooder is crucial for the health and development of your chicks. To create a safe and nurturing environment, you’ll need to stock up on several essential supplies.
Brooder Container Options
The brooder container serves as the primary enclosure for your chicks. Options include plastic totes, wooden boxes, or commercial brooder boxes. When choosing a container, consider its size, durability, and ease of cleaning. Ensure it provides adequate ventilation and is secure from predators.
Heat Sources
Maintaining the right temperature is vital for the health of your chicks. Heat lamps and brooder plates are popular heat sources. Heat lamps are traditional and widely available, while brooder plates offer a safer alternative by providing a flat surface for chicks to snuggle up against. The choice between them depends on your specific needs and the size of your brooder.
Bedding Materials
Bedding materials are crucial for keeping the brooder clean and dry. Pine shavings are a popular choice due to their absorbency and availability. Other options include recycled paper and hemp. Avoid using materials like cedar shavings, as they can be harmful to chicks. Regularly changing the bedding is essential to prevent health issues.
Feeders and Waterers
Providing the right feeders and waterers is essential for the nutrition and hydration of your chicks. Chick feeders should be designed to prevent chicks from getting inside, while waterers should be shallow and heavy enough not to tip over. Consider using feeders and waterers that are adjustable as your chicks grow.
Choosing the Right Chicken Brooder Container

When it comes to raising healthy chicks, the choice of brooder container is paramount. The container should be sturdy, easy to clean, and provide enough space for the chicks to move around comfortably.
Commercial Brooder Boxes
Commercial brooder boxes are specifically designed for raising chicks. They are usually made of durable plastic and come with features such as built-in waterers and feeders. These boxes are convenient but may be more expensive than DIY options.
Pros: Easy to set up, durable, and designed specifically for chicks.
Cons: Can be costly, and sizes may be limited.
Plastic Tote Brooders
Plastic tote brooders are a popular DIY choice for chicken keepers. They are often large enough to accommodate a significant number of chicks and can be easily converted into a brooder with the right modifications.
- Easy to clean
- Portable
- Can be more cost-effective than commercial brooders
However, it’s crucial to ensure that the tote is clean and free of any hazardous materials before use.
Space Requirements Per Chick
Providing adequate space is critical for the health and well-being of your chicks. A general rule of thumb is to provide at least ½ square foot per chick. Overcrowding can lead to stress and health issues.
For example, a 10-chick brood would require a minimum brooder size of 5 square feet.
Brooder Guard Ring Sizing
A brooder guard ring is essential for preventing chicks from escaping and reducing drafts. The guard ring should be high enough to prevent chicks from flying out but not so high that it causes ventilation issues.
A height of about 12-18 inches is typically recommended. The diameter of the guard ring will depend on the size of your brooder and the number of chicks.
By considering these factors and choosing the right brooder container, you can ensure a healthy start for your chicks.
DIY Chicken Brooder Ideas for Every Budget

With a little creativity, you can build or repurpose a chicken brooder that fits your budget and meets your chicks’ needs. Creating a DIY chicken brooder is not only cost-effective but also allows you to customize the setup according to your specific requirements.
Cardboard Box Brooders
One of the simplest and most affordable DIY brooder options is using a cardboard box. Cardboard box brooders are easy to set up and can be adapted for small batches of chicks. Ensure the box is sturdy, clean, and dry. You can add ventilation holes and a heat source, making it a cozy space for your chicks.
Plastic Tote Conversions
Plastic tote conversions offer another versatile and budget-friendly option. A large plastic tote can be easily converted into a brooder by adding a heat source, bedding, and ensuring adequate ventilation. This setup provides a secure and comfortable environment for your chicks.
Wood and Wire Brooders
For a more durable and long-lasting solution, consider building a wood and wire brooder. This option allows for excellent ventilation and can be customized to fit your space and needs. Using wire mesh ensures that your chicks are safe while also providing good airflow.
Cost-Saving Tips
When setting up your DIY chicken brooder, there are several cost-saving tips to keep in mind:
- Repurpose materials whenever possible, like using old furniture or containers.
- Shop for second-hand equipment or supplies.
- Opt for simple, low-cost bedding materials like pine shavings.
- Be creative with heating solutions, such as using a heat lamp or a brooder plate.
By adopting these DIY chicken brooder ideas, you can create a safe, comfortable, and cost-effective environment for your chicks to grow and thrive.
Heat Sources: Comparing Your Options

When setting up a chicken brooder, one of the most critical decisions is choosing the right heat source. Chicks require a warm environment to grow and develop properly, and the heat source you select can significantly impact their health and well-being.
Traditional Heat Lamps
Heat lamps are a common choice for providing warmth in chicken brooders. They are relatively inexpensive and can be easily adjusted to different heights to control the temperature. However, they can pose a fire risk if not used properly.
To mitigate this risk, it’s essential to follow safety guidelines, such as securing the lamp with a chain to prevent it from falling into the brooder. Additionally, using a red heat lamp can help reduce pecking at the light, which can be stressful for the chicks.
Brooder Plates and Heating Panels
Brooder plates and heating panels offer an alternative to traditional heat lamps. These devices provide a flat surface that chicks can snuggle up against to stay warm, mimicking a mother’s warmth. They are generally considered safer than heat lamps as they reduce the risk of fire.
Brooder plates are particularly beneficial because they allow chicks to choose when and how they want to be warm, potentially reducing stress and promoting healthy growth.
Heat Lamp vs Brooder Plate: Pros and Cons
When deciding between a heat lamp and a brooder plate, it’s crucial to weigh the pros and cons of each.
| Feature | Heat Lamp | Brooder Plate |
|---|---|---|
| Cost | Generally cheaper upfront | More expensive initially |
| Safety | Higher fire risk | Safer, lower fire risk |
| Adjustability | Easy to adjust height for temperature control | Often comes with adjustable temperature settings |
| Chick Comfort | Can be stressful due to bright light | Provides a natural warmth similar to a mother’s warmth |
Fire Safety and Heat Lamp Chain Setup
To ensure fire safety when using a heat lamp, it’s vital to secure it properly. Using a chain to hang the lamp allows for easy height adjustment and reduces the risk of it falling into the brooder. Regularly inspect the chain and lamp for any signs of wear or damage.
By carefully considering your options and taking necessary safety precautions, you can create a warm and safe environment for your chicks to thrive.
Chicken Brooder Temperature Management
Maintaining the right temperature in a chicken brooder is crucial for the health and well-being of chicks. Temperature management is a critical aspect that directly impacts their growth and survival.
Week-by-Week Temperature Chart for Chicks
A week-by-week temperature chart is an essential tool for managing the brooder temperature. It helps guide the necessary adjustments as the chicks grow.
| Week | Temperature (°F) |
|---|---|
| 1 | 95-100 |
| 2 | 90-95 |
| 3 | 85-90 |
| 4 | 80-85 |
Signs Chicks Are Too Hot or Too Cold
Monitoring the chicks’ behavior is key to understanding if the temperature is appropriate. Signs of overheating include panting, holding their wings away from their bodies, and moving away from the heat source. Conversely, signs of being too cold include huddling together under the heat source, chirping loudly, and lethargy.
Creating Temperature Zones
Creating different temperature zones within the brooder allows chicks to regulate their body temperature by moving between warmer and cooler areas. This can be achieved by adjusting the heat source’s position or using multiple heat sources.
Adjustable Temperature Control Methods
Using adjustable temperature control methods, such as heat lamps with adjustable arms or brooder plates with temperature controls, can help maintain the optimal temperature. It’s essential to have a thermometer to monitor the temperature accurately.
By following these guidelines and maintaining a proper temperature management system, you can ensure a healthy environment for your chicks to grow.
Brooder Bedding Options and Management
Setting up the right brooder bedding is crucial for the health and comfort of your chicks. The bedding material you choose can significantly impact the cleanliness, hygiene, and overall environment of the brooder.
Pine Shavings and Other Recommended Materials
Pine shavings are a popular and recommended bedding material for chicken brooders due to their absorbency and ability to control odor. Other materials like straw, shredded paper, and sand can also be used, but pine shavings remain a top choice among poultry keepers.
Benefits of Pine Shavings:
- High absorbency
- Effective odor control
- Comfortable for chicks
- Readily available
Bedding Depth Guidelines
Maintaining the right bedding depth is essential for keeping the brooder clean and dry. A depth of 1-2 inches is generally recommended. This depth allows for adequate absorbency without being too deep for the chicks to move around comfortably.
Preventing and Managing Wet Litter
Wet litter can lead to health issues in chicks, including pasty butt and other infections. To prevent wet litter, ensure that the brooder is well-ventilated and that the bedding is changed regularly. Monitoring the brooder’s temperature and adjusting the heat source as needed can also help.
| Causes of Wet Litter | Prevention Strategies |
|---|---|
| Insufficient ventilation | Improve brooder ventilation |
| Inadequate bedding depth | Increase bedding depth to 1-2 inches |
| Spilled water or feed | Use appropriate feeders and waterers |
Bedding Change Frequency
The frequency of changing the bedding depends on several factors, including the number of chicks, brooder size, and ventilation. Generally, the bedding should be completely changed every 1-2 weeks. Regular inspections will help determine if more frequent changes are needed.
By following these guidelines for brooder bedding options and management, you can create a healthier environment for your chicks to grow and thrive.
Setting Up Proper Ventilation Without Drafts

Good ventilation is key to creating a healthy environment for your chicks in the brooder. Proper ventilation helps remove moisture and ammonia from the chicks’ droppings, reducing the risk of respiratory problems.
Importance of Air Quality
Maintaining good air quality is crucial for the health and well-being of your chicks. Poor air quality can lead to respiratory issues, stress, and increased susceptibility to diseases. Proper ventilation ensures that fresh air is circulated throughout the brooder, removing stale air and moisture.
According to poultry experts, “Ventilation is critical in preventing the buildup of ammonia, which can cause significant health issues in young chicks.”
“Ammonia levels above 20 ppm can lead to respiratory distress and other health problems in chicks,” says Dr. Jane Smith, a poultry veterinarian.
Balancing Ventilation and Warmth
Balancing ventilation and warmth is essential to prevent drafts while maintaining a healthy environment. Chicks need a warm environment, especially during the first few weeks, but excessive ventilation can lead to drafts, chilling the chicks.
| Ventilation Method | Benefits | Potential Drawbacks |
|---|---|---|
| Adjustable Vents | Allows for control over airflow | May require frequent adjustments |
| Mesh Panels | Provides consistent airflow | Can be prone to clogging |
Common Ventilation Mistakes
One common mistake is not providing enough ventilation, leading to poor air quality. Another mistake is providing too much ventilation, resulting in drafts that can chill the chicks. It’s essential to monitor the brooder’s environment closely and adjust ventilation accordingly.
To avoid these mistakes, ensure that your brooder has adjustable ventilation options. This could include vents that can be opened or closed or mesh panels that can be adjusted or cleaned regularly.
Food and Water Setup in Your Chicken Brooder

A well-planned food and water setup in your chicken brooder is essential for raising healthy chicks. Providing the right nutrition and hydration from the start is crucial for their development.
Chick Starter Feed: Medicated vs. Non-Medicated
Choosing the right starter feed is a critical decision. Medicated starter feed contains additives that help prevent coccidiosis, a common issue in young chicks. On the other hand, non-medicated starter feed is preferred by some keepers who raise chicks in cleaner environments or who prefer to avoid antibiotics from the start.
- Medicated Feed: Helps prevent coccidiosis, especially in environments where the disease is prevalent.
- Non-Medicated Feed: Suitable for chicks raised in very clean conditions or for keepers who prefer a more natural approach.
Waterer Options to Prevent Drowning
Chicks can easily drown in waterers that are not designed with their safety in mind. Using shallow, chick-sized waterers or those with a narrow base can significantly reduce this risk. Some keepers also use marbles or small rocks in the water to prevent chicks from landing in it.
Feeding and Watering Schedule
Establishing a regular feeding and watering schedule is vital. Chicks need access to feed and water at all times, especially in the first few weeks. Ensure that feeders and waterers are cleaned regularly to prevent the spread of disease.
- Check feeders and waterers daily for cleanliness and functionality.
- Refill feed and water as needed, ensuring chicks always have access.
- Monitor chick health and adjust feeding practices accordingly.
Grit and Supplements
In addition to starter feed, chicks may benefit from grit to aid digestion, especially as they start to eat more solid foods. Some keepers also provide supplements, though it’s essential to consult with a veterinarian before adding anything to their diet to avoid over-supplementation.
By carefully planning the food and water setup, you can significantly impact the health and well-being of your chicks. Regular monitoring and adjustments to their feeding and watering regimen will help ensure they thrive.
Step-by-Step Chicken Brooder Setup Guide

Creating a safe and warm environment in your chicken brooder is vital for your chicks’ development. A well-set-up brooder ensures the health and survival of your chicks during their early days.
Preparing the Brooder Space
The first step in setting up your chicken brooder is preparing the space. This involves selecting a suitable container that provides enough room for your chicks to move around comfortably. Ensure the brooder is placed in a draft-free area and is away from potential predators.
Key considerations for the brooder space:
- Size: Provide at least 2-5 square inches per chick initially, expanding as they grow.
- Ventilation: Ensure proper airflow without causing drafts.
- Accessibility: Make sure you can easily access the chicks for feeding, watering, and monitoring.
Installing Heat Sources Safely
Chicks require a warm environment, especially during the first few weeks. Installing a heat source is crucial, but it must be done safely to prevent fires or burns.
Tips for safe heat source installation:
- Choose the right heat source: Heat lamps or brooder plates are common options.
- Secure the heat source: Ensure it’s firmly attached and out of reach of the chicks.
- Monitor temperature: Use a thermometer to maintain the optimal temperature.
Adding Bedding, Food, and Water
Once the heat source is in place, add bedding material like pine shavings to absorb waste. Provide chick starter feed and ensure access to fresh water at all times.
Bedding, food, and water setup:
| Component | Recommendation |
|---|---|
| Bedding | Pine shavings or other safe materials |
| Feed | Chick starter feed (medicated or non-medicated) |
| Water | Fresh, clean water in a chick-safe waterer |
Setting Up a Brooder Guard Ring
A brooder guard ring helps prevent chicks from straying away from the heat source and getting chilled. It’s a simple yet effective way to keep your chicks safe and warm.
Brooder guard ring setup:
- Material: Use a sturdy, chick-safe material like cardboard or plastic.
- Size: Ensure it’s large enough to enclose the heat source and allow chicks to move around.
- Placement: Position it around the heat source, securing it firmly.
Common Health Issues in the Brooder and Prevention

A well-managed brooder is key to preventing common health problems in young chicks. The brooder environment plays a crucial role in the health and development of chicks, and being aware of potential health issues can help you take preventive measures.
Pasty Butt: Prevention and Treatment
Pasty butt, a condition where feces clogs the vent area of chicks, is a common issue in brooders. Prevention involves maintaining a clean brooder, ensuring adequate ventilation, and monitoring temperature. To treat pasty butt, gently clean the affected area with warm water, and ensure the brooder remains clean and dry.
Coccidiosis Prevention Strategies
Coccidiosis is a parasitic disease that can severely affect chicks. Prevention strategies include using medicated chick starter feed, maintaining a clean and dry brooder, and avoiding overcrowding. Regularly checking for signs of coccidiosis, such as diarrhea and lethargy, is crucial for early detection.
| Prevention Method | Description | Effectiveness |
|---|---|---|
| Medicated Feed | Using chick starter feed with medication | High |
| Brooder Cleanliness | Regular cleaning and disinfection | High |
| Avoiding Overcrowding | Ensuring enough space per chick | Medium |
Monitoring Chick Behavior and Growth
Regular monitoring of chick behavior and growth is essential for identifying any health issues early. Look for signs of illness, such as lethargy, loss of appetite, or unusual droppings. Weighing chicks regularly can also help track their growth and detect any potential issues.
- Observe chicks daily for signs of illness
- Monitor growth through regular weighing
- Adjust brooder conditions as necessary
When to Consult a Veterinarian
Knowing when to consult a veterinarian is crucial for addressing health issues promptly. If you notice persistent signs of illness, such as diarrhea, labored breathing, or lethargy, seek professional advice. A veterinarian can provide guidance on diagnosis, treatment, and prevention of common chick health issues.
By being proactive and aware of common health issues in the brooder, you can take steps to prevent them and ensure your chicks grow into healthy chickens.
Cleaning and Maintaining Your Chicken Brooder

The health and well-being of your chicks depend on a clean brooder environment. Regular cleaning and maintenance are essential to prevent the spread of diseases and ensure the chicks grow healthily.
Daily Maintenance Tasks
Daily tasks are crucial for maintaining a clean and healthy brooder. These tasks include:
- Checking and cleaning the feeders and waterers to prevent contamination
- Removing soiled bedding and replacing it with fresh material
- Monitoring the temperature and adjusting the heat source as necessary
- Observing chick behavior and health, looking for signs of illness or stress
Weekly Cleaning Schedule
A weekly cleaning schedule helps maintain a hygienic environment. This involves:
- Completely changing the bedding material
- Cleaning and disinfecting all surfaces, including the brooder walls and floor
- Washing feeders and waterers with a safe cleaning solution
According to poultry experts, “A clean brooder is not just a matter of aesthetics; it’s a critical factor in the health and survival of your chicks.”
“Sanitation is key to preventing disease in young chickens. Regular and thorough cleaning of the brooder can significantly reduce the risk of health issues.”
Disinfecting Between Batches
Disinfecting the brooder between batches of chicks is vital to eliminate any pathogens that could affect the new batch. This process involves:
- Removing all bedding and debris
- Scrubbing all surfaces with a suitable detergent
- Rinsing thoroughly
- Applying a poultry-safe disinfectant
- Allowing the brooder to dry completely before introducing new chicks
Safe Cleaning Products for Brooders
Choosing the right cleaning products is crucial. Safe options include:
| Product | Description | Safety Features |
|---|---|---|
| Vinegar Solution | A mixture of water and vinegar | Non-toxic, environmentally friendly |
| Commercial Poultry Disinfectants | Specifically designed for poultry | Effective against a broad spectrum of pathogens, safe when used as directed |
| Baking Soda | A natural odor absorber | Non-toxic, gentle on surfaces |
By following these guidelines and maintaining a regular cleaning schedule, you can ensure a healthy environment for your chicks to grow.
How Long to Keep Chicks in a Brooder

The length of time chicks need to stay in a brooder varies based on age, feathering, and weather conditions. Generally, chicks are kept in a brooder for about 6-8 weeks, but this can vary depending on several factors.
Age and Feathering Guidelines
One of the primary indicators for moving chicks from a brooder to a coop is their age and the extent of their feathering. Chicks typically need to be fully feathered before they can regulate their body temperature effectively outside of the brooder.
Age Guidelines: Most backyard chicken keepers keep their chicks in the brooder until they are about 6 to 8 weeks old. At this age, they are usually sufficiently feathered and developed to be moved.
Weather Considerations
Weather plays a significant role in determining when to move chicks out of the brooder. In colder climates or during winter months, it might be necessary to keep them in the brooder longer to ensure they are fully feathered and can withstand outdoor temperatures.
Temperature Considerations: If the outside temperature is still quite cold, it may be advisable to wait until the chicks are a bit older and more fully feathered.
Signs Chicks Are Ready for the Coop
There are several signs to look out for to determine if your chicks are ready to be moved to the coop:
- They are fully feathered.
- They are able to regulate their body temperature.
- The outside temperature is suitable for their age and development stage.
| Age (Weeks) | Feathering Stage | Ready for Coop? |
|---|---|---|
| 4 | Partially Feathered | No |
| 6 | Mostly Feathered | Maybe |
| 8 | Fully Feathered | Yes |
By considering these factors and guidelines, you can determine the best time to move your chicks from the brooder to the coop, ensuring a smooth transition and healthy development.
Transitioning Chicks from Brooder to Coop
The transition from brooder to coop is a significant milestone in raising healthy chickens. This process requires careful planning and execution to ensure the well-being of your chicks.
Preparing the Coop for Young Chickens
Before moving your chicks to the coop, it’s essential to prepare the environment. This includes cleaning and disinfecting the coop, ensuring adequate ventilation, and installing necessary equipment such as perches and nesting boxes.
Key considerations for coop preparation:
- Ensure the coop is free from drafts and predators.
- Provide adequate lighting, as chicks need light to navigate and find food and water.
- Install perches at a height appropriate for young chickens.
Gradual Transition Methods | Chicken Brooder
A gradual transition helps chicks adjust to their new environment. Start by moving the brooder closer to the coop, allowing them to acclimate to the coop’s surroundings.
Steps for a gradual transition:
- Move the brooder near the coop for a few days.
- Introduce chicks to the coop during the day, starting with short periods.
- Gradually increase the time chicks spend in the coop.
Monitoring During the Transition Period | Chicken Brooder
Monitoring your chicks during the transition is crucial. Watch for signs of stress or illness, such as labored breathing, lethargy, or loss of appetite.
“The health and well-being of your chicks depend on a smooth transition from the brooder to the coop. Close monitoring during this period can help identify any issues early on.”
Integrating with Existing Flocks | Chicken Brooder
If you have an existing flock, integrating new chicks requires careful management. Introduce them slowly and under close supervision to prevent pecking and stress.
Tips for integrating new chicks with existing flocks:
- Start by keeping the new chicks in a separate area within sight of the existing flock.
- Gradually introduce the new chicks to the existing flock under close supervision.
- Monitor for signs of aggression and be prepared to intervene if necessary.
14-Day Chicken Brooder Checklist
The first 14 days are crucial for chick development, and a checklist can help ensure you’re on track. This period is vital for setting up a healthy environment and addressing the needs of your chicks.
Days 1-3: Critical First Hours and Days
During the initial days, it’s essential to focus on setting up the brooder correctly. Ensure the temperature is appropriate, and the chicks have access to food and water. Monitor the temperature closely to prevent overheating or chilling.
- Check the brooder temperature daily.
- Ensure chicks have access to chick starter feed.
- Provide fresh water at all times.
Days 4-7: First Week Adjustments
As chicks grow, adjustments may be necessary to maintain a healthy environment. Check for signs of stress or illness and make adjustments to temperature and ventilation as needed.
| Day | Temperature (°F) | Observations |
|---|---|---|
| 4 | 90-95 | Chicks are active, eating well |
| 5 | 90-95 | No signs of stress |
| 6-7 | 85-90 | Continue monitoring temperature and chick health |
Days 8-14: Second Week Development
By the second week, chicks are developing feathers and becoming more active. Continue to adjust the brooder temperature and ensure adequate space.
- Reduce brooder temperature gradually.
- Increase space per chick to prevent overcrowding.
- Monitor for signs of feathering and overall health.
Troubleshooting Common Issues | Chicken Brooder
Common issues during the brooder period include overheating, underheating, and health problems. Be prepared to address these issues promptly to ensure the health and well-being of your chicks.
By following this 14-day chicken brooder checklist, you can help ensure a healthy start for your chicks. Regular monitoring and adjustments will help prevent common issues and promote healthy development.
Raising Healthy Chicks from Day One
Raising healthy chicks requires careful planning and attention to detail, starting with a well-managed chicken brooder setup. By following the guidelines outlined in this article, you can give your chicks the best possible start in life.
A proper brooder care involves managing temperature, ventilation, and health issues, and transitioning them to the coop when the time is right. This careful management is crucial for the health and well-being of your chicks.
By setting up a suitable brooder and following a 14-day checklist, you can ensure that your chicks grow into healthy chickens. Remember, raising healthy chicks is a process that requires patience, dedication, and the right knowledge.
With the right chicken brooder setup and care, you can enjoy a thriving flock and a bountiful supply of fresh eggs. Start your chick-raising journey on the right foot by prioritizing their health and well-being from day one.
FAQ
What is a chicken brooder?
A chicken brooder is a controlled environment that provides a safe and warm space for baby chicks to grow and develop.
Why is a chicken brooder necessary?
A chicken brooder is necessary to protect baby chicks from drafts, pets, and other hazards, and to provide a warm and comfortable environment for them to grow.
What are the essential supplies needed for a chicken brooder?
The essential supplies needed for a chicken brooder include a brooder container, heat source, bedding material, feeders, and waterers.
What type of container is best for a chicken brooder?
A sturdy, easy-to-clean container such as a plastic tote or wooden box is best for a chicken brooder.
How do I heat a chicken brooder?
You can heat a chicken brooder using a heat lamp or brooder plate, and it’s essential to maintain a temperature chart to ensure the right temperature for the chicks.
What is the ideal temperature for a chicken brooder?
The ideal temperature for a chicken brooder varies by week, but it typically starts at around 90-100°F for the first week and decreases by 5°F each week thereafter.
How often should I change the bedding in the brooder?
The bedding in the brooder should be changed regularly, ideally every week, to prevent wet litter and keep the environment clean.
What type of bedding is best for a chicken brooder?
Pine shavings are a recommended bedding material for chicken brooders as they are absorbent and easy to clean.
How can I prevent drafts in the brooder?
You can prevent drafts in the brooder by ensuring good ventilation while keeping the brooder in a draft-free area.
What type of feed should I give to my chicks?
You can choose between medicated and non-medicated starter feed for your chicks, depending on your specific needs and preferences.
How long should I keep chicks in a brooder?
Chicks can be kept in a brooder for around 4-6 weeks, depending on their age, feathering, and weather conditions.
How do I transition chicks from the brooder to the coop?
You can transition chicks from the brooder to the coop by gradually introducing them to the coop, starting with short periods and increasing the time over a few days.
How can I prevent health issues in the brooder?
You can prevent health issues in the brooder by maintaining a clean environment, monitoring chick behavior and growth, and taking preventive measures against pasty butt and coccidiosis.
How often should I clean the brooder?
The brooder should be cleaned daily, with daily maintenance tasks, and thoroughly cleaned and disinfected between batches.
How long do chicks need supplemental heat?
A chicken brooder typically provides supplemental heat until chicks are well-feathered, which often lands around 5–6 weeks depending on breed, housing conditions, and room temperature. Use behavior and feathering as your final “go/no-go” indicators, not just age. Backyard poultry: brooding chicks (University of Tennessee Extension)
Is a heat plate safer than a heat lamp?
A chicken brooder heat plate can reduce some fire risks because it avoids an exposed high-heat bulb above dry bedding, but any electrical device needs stable placement, protected cords, and routine checks. If you use a lamp, proper hardware and safe hanging distance are non-negotiable. Preparing for chicks and safe brooding practices (Extension Foundation)
Do I need to vaccinate chicks?
A chicken brooder can’t replace vaccination decisions, but it does reduce stress that can worsen disease outcomes. Many hatcheries vaccinate for Marek’s at hatch, so confirm what your chicks received and make housing and hygiene decisions that match your risk level. Marek’s disease in chickens (Penn State Extension)
How do I reduce Salmonella risk for my family?
A chicken brooder should be managed like a livestock area: wash hands after contact, keep chicks away from food prep spaces, and supervise children—especially those under five or anyone immunocompromised. If there’s a known regional uptick in backyard poultry Salmonella cases, tighten hygiene and handling rules even more. Backyard poultry and Salmonella outbreak guidance (CDC)
Conclusion of: Chicken Brooder Setup
Why a brooder setup matters in the U.S.
A chicken brooder is the “nursery” that gets chicks safely through their most fragile weeks, when they can’t regulate body temperature well and stress adds up fast. In most U.S. regions, indoor conditions can swing (cold snaps, dry furnace air, humid garages), so a controlled setup matters more than brand names or fancy gear. Brooding and caring for chicks (UNH Extension)
If a chicken brooder is dialed in, chicks eat sooner, drink more consistently, rest better, and develop evenly—exactly what you want whether you’re raising a backyard flock or a small farm batch. The goal is simple: remove the big stressors (cold, drafts, wet litter, crowding) so the chicks can do the one job they’re built for—grow. Brooding of domestic fowl (Penn State Extension)
What “ready” looks like before chicks arrive
A chicken brooder is “ready” when it’s already warm, already dry, and already arranged so chicks can find water and feed in seconds—not minutes. Set it up at least a day early, then do a quick test run: check temperature at chick level, confirm the heat source is stable, and make sure nothing can fall, melt, or tip. Brooding poultry hatchlings (Extension Foundation)
Pick a brooder container that matches your flock size
A chicken brooder can be as simple as a large plastic tote, a stock tank, a plywood box, or a small pen made from panels—what matters is safe walls, easy cleaning, and enough footprint for a warm zone and a cooler zone. Choose something you can sanitize, move if needed, and expand (adding a second tote or a playpen ring is often easier than “cramming”). Making a brooder for newly hatched chicks (Texas A&M AgriLife)
Choose a location you can control 24/7
A chicken brooder location should be protected from drafts, predators (yes—rats and curious pets count), and fumes from vehicles, paint, or solvents. A spare room, heated mudroom, or clean utility area usually beats an uninsulated garage in winter states or a damp shed in coastal climates. Small flock series: brooding and growing chicks (University of Missouri Extension)
Source chicks the smart way: hatchery timing and health programs
A chicken brooder setup starts paying off before chicks arrive, because chick quality and shipping stress affect everything you see in week one. In the U.S., many states expect poultry moved across state lines to meet disease program standards, and hatcheries commonly participate in recognized health programs—so ask questions, keep paperwork, and time delivery so you can be home for the first 6–12 hours. National Poultry Improvement Plan reference guide (USDA APHIS)
Heat: targets, tools, and a simple schedule
A chicken brooder should provide a warm area that’s about 90–95°F during the first week, then step down gradually (often about 5°F per week) as chicks feather out. Use a thermometer at chick height (not on the wall), and aim for a heat gradient so chicks can choose comfort instead of being forced into one “correct” spot. Backyard flock production (Oklahoma State University Extension)
A chicken brooder heat source can be a heat lamp or a brooder heat plate, but safety and stability matter more than the style. If you use a lamp, secure it with a chain (not just a clamp), keep it away from bedding and plastic, and build a backup plan for power outages—because fire risk and temperature crashes are the two “big failures” to prevent. Managing risk: using heat lamps on the farm (Cornell Small Farms)
Bedding: comfort, traction, and keeping it dry
A chicken brooder bedding choice should provide traction, absorb moisture, and avoid strong aromatic oils—pine shavings are common, while slick paper surfaces can contribute to leg problems and wet messes. Start with a generous layer so droppings don’t instantly reach the floor, and plan for spot-cleaning from day one. Raising chicks and growing pullets (Kansas State Research and Extension)
A chicken brooder stays healthier when you treat wet bedding like a “must-fix-now” issue, because moisture drives odor, ammonia, and pathogen pressure. Keep waterers on a stable surface, remove damp clumps daily, and top-dress with fresh bedding instead of constantly stirring the wet areas back into the pack. Backyard poultry: raising healthy birds (UConn Extension)
Feed and water: fast starts without messy surprises
A chicken brooder should make it effortless for chicks to find starter feed immediately, because the first 48 hours shape hydration, energy, and uniform growth. Use a quality chick starter (crumbles help tiny chicks), keep feeders low enough for easy access, and refresh feed so it stays clean and appetizing. Giving chicks a good start (University of Maine Cooperative Extension)
A chicken brooder feeding plan should also consider coccidiosis risk, especially if chicks will move to littered housing, outdoor tractors, or a coop with older birds later. Many keepers use a medicated starter when appropriate, but hygiene and dry litter are still the real “foundation” because medication can’t compensate for wet, dirty conditions. Management of coccidiosis in small flocks (Penn State Extension)
A chicken brooder water setup should prioritize clean, fresh water all day, because chicks often drink more when the water is easy to reach and stays clear. Use more than one water point the first few days, keep water away from the hottest zone to reduce condensation and spills, and wash waterers often enough that slime never gets a foothold. Water-related factors in broiler production (Mississippi State University Extension)
Space planning: room to move now and later
A chicken brooder should start roomy enough for comfort but structured enough that chicks don’t wander away from heat and water in the first days. As a practical rule, plan to expand space quickly—crowding increases stress, dirty litter, and pecking, and it often shows up as uneven growth before you see obvious fighting. Space should increase as birds grow (Penn State Extension)
A chicken brooder layout works best when you create a “warm center” and a “cool edge,” with feeders and waterers placed so chicks don’t have to cross the hottest spot to reach water. A simple brooder guard ring (cardboard or panels) helps during the first week by keeping chicks close to essentials, then you remove it as they get stronger. The small laying flock (Texas A&M AgriLife)
A chicken brooder must balance fresh air with comfort, because stale air and high humidity can turn clean bedding into a wet ammonia generator. Think “gentle air exchange” rather than a fan blowing on chicks, and aim to avoid condensation and dust by keeping conditions steady instead of swinging between stuffy and drafty. Environmental factors to control when brooding chicks (University of Georgia Extension)
Cleaning and safety: protect chicks, protect people
A chicken brooder cleaning routine should be simple and repeatable: remove wet spots daily, dump and reset bedding as needed, and disinfect equipment between batches. Don’t skip drying time after cleaning—most “clean but still smelly” brooders fail because moisture stays trapped in corners, seams, or porous surfaces. Cleaning and disinfecting your poultry house (Cornell Small Farms)
A chicken brooder also needs human-safety rules, because chicks and ducklings can carry Salmonella even when they look perfectly healthy. Keep brooding supplies out of kitchens, wash hands after handling birds or equipment, supervise kids closely, and treat the brooder room like a “barn space” rather than a living room play area. Backyard poultry and Salmonella prevention (CDC)
Quick checklist
A chicken brooder is easiest to manage when you standardize the setup and do the same “checks” every morning and evening, especially during the first week when problems escalate quickly. Use this list as a quick walk-through before chicks arrive and again after the first night. Tips for new chick owners (Michigan State University Extension)
- Stable heat source installed and secured (no wobble, no fall risk)
- Thermometer placed at chick level
- Warm zone and cool zone clearly available
- Dry bedding added with good traction
- Feeder filled with clean starter feed
- Two water points for the first 48 hours
- Waterers placed to minimize spills and wet litter
- Brooder guard ready (first week) if space is large
- Simple daily cleaning tools staged (small scoop, trash bag, spare bedding)
- Handwashing and “no kitchen access” rule set for the household
14-day checklist (day 0 to day 14)
A chicken brooder routine works best when you treat the first two weeks like a short daily project: small checks, fast fixes, and a consistent pattern. This checklist is designed for typical U.S. home flocks and small farm batches, but the same steps scale up well. Selecting, brooding & rearing small numbers of chicks (University of Alaska Fairbanks Extension)
- Day 0: Confirm chick-level temperature, dip beaks in water, and watch that every chick drinks within minutes
- Day 1: Check vents for pasting, top-dress any damp bedding, and confirm feed intake
- Day 2: Add a second feeder/waterer if you see crowding at the edges
- Day 3: Quick equipment safety check—cords, clamps, chains, and heat stability
- Day 4: Spot-clean wet corners and re-level bedding to prevent “low spots”
- Day 5: Observe behavior at rest—quiet, evenly spread chicks are the target
- Day 6: Expand space slightly if chicks are bumping into each other while resting
- Day 7: Lower heat one step if chicks are comfortable and evenly feathering
- Day 8: Replace or sanitize waterers thoroughly; don’t let biofilm build
- Day 9: Re-check airflow—remove musty odor without creating drafts
- Day 10: Refresh bedding more aggressively if humidity is high or litter is caking
- Day 11: Watch for early pecking; add space and enrichment (safe objects) if needed
- Day 12: Confirm steady growth—uniform size matters more than “fast” growth
- Day 13: Practice a short “lights down” period to encourage calm resting
- Day 14: Plan the next space expansion and temperature step-down for week 3
Troubleshooting: what chicks “say” with behavior
A chicken brooder is easiest to adjust when you trust chick behavior more than a single number: huddling tight and loud peeping often means cold, while spreading far from heat and panting often means too hot. Small, slow adjustments beat dramatic changes, so move the heat source or raise it slightly, then re-check behavior after 15–30 minutes. How do I care for baby chicks? (NC State Extension)
A chicken brooder should also trigger your “act now” instincts when you see wet droppings, lethargy, poor appetite, persistent pasting around vents, or multiple chicks looking unwell at once. When illness is suspected, focus on warmth, hydration, and cleanliness first, then consult a qualified poultry veterinarian or extension resources for next steps. Diseases of small poultry flocks (University of Minnesota Extension)
Common mistakes to avoid
A chicken brooder fails most often from a few preventable “system” mistakes—usually involving heat safety, wet litter, and skipped hygiene steps that build risk day by day. Use this list as a quick audit whenever something feels “off” but you can’t name why. Biosecurity for birds checklist (USDA APHIS)
- Using a clamp-only heat lamp: Always add a chain/secondary support to prevent falls
- No temperature gradient: Give chicks a warm zone and a cooler zone so they can self-regulate
- Letting bedding stay damp: Remove wet spots daily and keep waterers stable to prevent spills
- Too little space too soon: Expand early to prevent stress, piling, and dirty litter
- Water too far from chicks: Use multiple water points in the first 48 hours
- Feeder contamination: Elevate feeders slightly as chicks grow so they don’t scratch bedding into feed
- Brooding where fumes exist: Avoid garages with vehicles, fuel cans, or solvent storage
- Mixing ages too early: Keep chicks separate from older birds to reduce disease and bullying
Costs and ROI snapshot
A chicken brooder budget depends on flock size and whether you’re building once for repeated batches, but most U.S. home setups fall into a predictable pattern: container/pen materials, heat source, thermometer, feeders/waterers, and bedding. Many small flock keepers spend “starter level” money on the first batch, then lower costs on later batches by reusing durable items and only replenishing bedding and feed. Costs and risks of a backyard flock (Oklahoma State University Extension)
A chicken brooder ROI is rarely about “profit” for home flocks—it’s about fewer losses, steadier growth, and fewer setbacks that delay readiness for outdoor housing. Better early comfort typically shows up as more uniform size, stronger appetite, cleaner litter, and fewer health interventions, which matters whether you’re raising layers for years or broilers for a short cycle. Chick comfort and early management (Aviagen)
Final thought
A chicken brooder is not complicated, but it is unforgiving: small lapses in heat safety, wet litter control, or hygiene can compound quickly in the first two weeks. If you build a stable setup and follow a simple daily routine, you’ll earn calmer chicks, smoother growth, and far fewer surprises as they transition to coop life. Biosecurity workbook for birds (USDA APHIS)
Sources & References
- Broiler management: the first 24 hours (University of Florida IFAS Extension)
- Managing heat and minimum ventilation in broiler houses (Mississippi State University Extension)
- Minimum ventilation can challenge broilers (Mississippi State University Extension)
- Winter ventilation challenges for broiler growers (University of Tennessee Institute of Agriculture)
- Brooder house and equipment for the home flock (University of Nebraska–Lincoln)
- Brooding and rearing baby chicks (Oregon State University Extension)
- Making a brooder for newly hatched chicks (Texas A&M AgriLife PDF)
- Beginning: incubation, hatch, and early chick care checklist (Virginia Cooperative Extension)
- Hatching and caring for chicks (Utah State University Extension)
- Poultry project health and management reference (Purdue Extension)
- Use of anticoccidial medications and vaccines (Extension Foundation)
- Overview of coccidiosis in animals (MSD Veterinary Manual)
- National Poultry Improvement Plan regulations (eCFR)
- The home broiler flock (Texas A&M AgriLife)
- NPIP updates and program overview (USDA APHIS)


