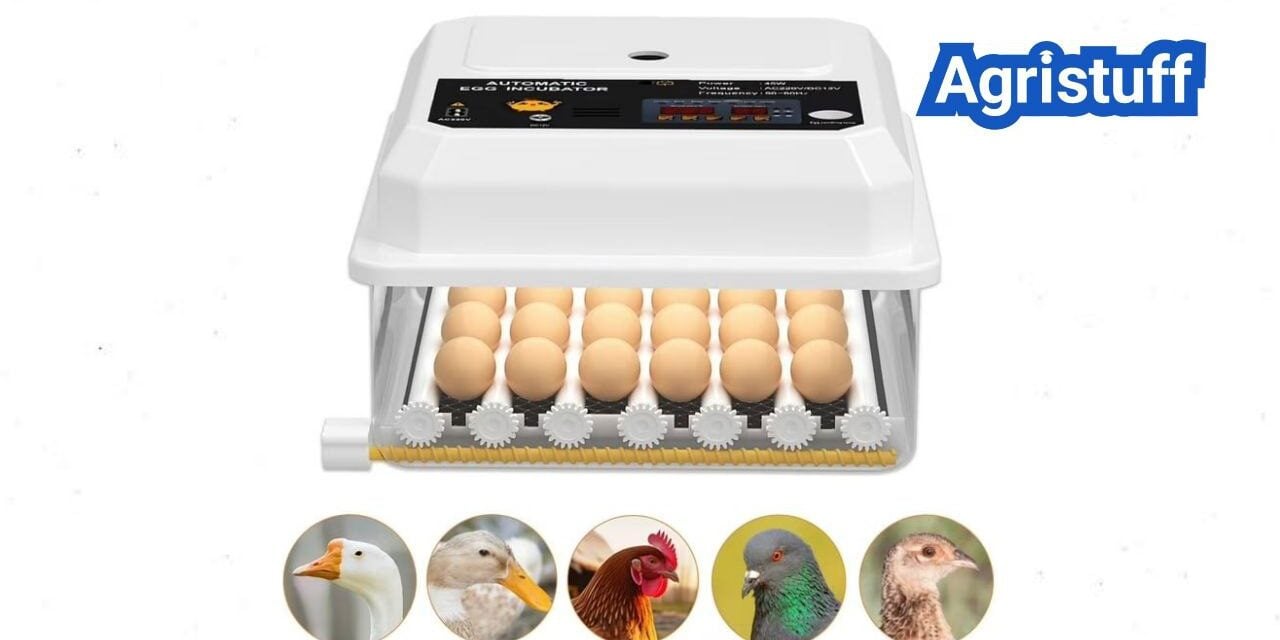
Ready to raise healthy chicks in your backyard? This roundup helps U.S. keepers choose a reliable incubator that supports steady hatch results without stepping up to commercial cabinet rigs to get the best incubator for chicken eggs
High hatch rates in a home setup mean realistic expectations: most home hatches fall between 50% and 80%, depending on equipment, egg quality, and technique. Forced-air models use a fan to keep warm, humid air moving. That often cuts hot and cold spots and improves consistency over still-air designs.
Our focus is consistency: stable airflow, steady temperature, and practical humidity control across the full 21-day cycle. We highlight units that reduce human error with features like automatic turning, clear controls, alarms, and easy water top-offs. Ease of cleaning between hatches is also a priority.
The recommendations that follow are grouped by common needs — compact options, budget starters, family-size hatches, and larger capacity units — with quick “who it’s for” notes so you can match an egg incubator to your flock goals.
Key Takeaways
- Expect 50–80% hatch rates at home; equipment and egg quality matter.
- Forced-air designs give more even heat and better consistency.
- Look for auto-turning, stable controls, readable displays, and alarms.
- Choose size by how many eggs you plan to incubate and available space.
- Easy cleaning and simple water access cut down on user errors.
What matters most for high hatch rates when hatching chicks at home

Success in a backyard hatch often comes down to a few core performance points. Focus on airflow, stable heat, and predictable moisture loss before you pick a model. Below are the practical traits that make hatching chicks repeatable and less stressful.
Forced air vs still air | Best Incubator for Chicken Eggs
Consistent airflow drives uniform embryo development. Forced air units use a fan to cut hot and cold spots that cause staggered hatches. Still-air designs can work, but they need careful placement and monitoring.
Temperature stability | Best Incubator for Chicken Eggs
Tiny swings matter: a 1°F change can shift hatch timing and affect leg or umbilical health. Digital thermostats and a stable room beat constant dialing. Aim for steady setpoints over perfection chasing.
Humidity control basics | Best Incubator for Chicken Eggs
Humidity governs moisture loss across the 21-day cycle. Too high risks “drowning” at pip; too low creates “shrink-wrapped” chicks. Reliable humidity control and easy water access make outcomes predictable.
Automatic turner vs manual turning | Best Incubator for Chicken Eggs
Turn eggs at least three times daily through day 18. An automatic turner cuts missed turns, reduces lid opening, and lowers handling stress during the first days.
- Capacity planning: Expect 50–80% hatch rates and roughly half may be roosters; set more eggs than desired pullets.
- Easy cleaning: Smooth plastic or ABS parts disassemble and sanitize faster than porous foam.
- Viewing window: Watch pipping without opening the lid to protect humidity.
- Alarms & displays: Digital readouts and alerts give fast warning if temperature humidity drift overnight or during work hours.
Bottom line: prioritize steady air movement, tight temperature control, trustworthy humidity control, and features that reduce handling. Those criteria will help you compare models in the U.S. market and raise hatch rates with less guesswork.
How we picked products for this roundup in the United States

We prioritized measurable consistency across a full 21-day cycle when narrowing choices. That meant looking past specs to how a unit performs over multiple runs and how it copes with real home variables.
Selection standards based on controls, features, and reliability
Repeatable hatch performance was the main filter. We rated units on stable airflow, automated temperature stability, and reliable turning that reduce human error.
Humidity management earned extra weight. Automatic humidity raises a unit to near hands-off operation. Manual systems still work, but they need routine water checks.
- Practical features: readable displays, alarms, viewing windows, and easy water access.
- Serviceability: U.S. availability, common spare parts, and broad user adoption to make repairs and replacement simple.
- Cleaning & durability: removable trays, smooth plastics, and robust trays that hold up run after run.
What “set it and forget it” really means for time, travel, and consistency
At minimum, set-and-forget means an automatic turner plus stable temperature control. Add automatic humidity and alarms and you get closer to true hands-off operation.
Even with high automation, plan checks before trips. Users should verify readings with independent thermometers and hygrometers. Avoid opening the lid unnecessarily to keep a steady hatch environment.
Best incubator for chicken eggs for most backyard keepers

For most backyard keepers, a mid-capacity model that balances control and simplicity is the sensible place to start. These picks aim to cut babysitting time while keeping hatch rates steady.
Brinsea Ovation 28 EX — the precision pick
The Ovation 28 EX stands out for precise temperature andfully automatic humidity control. Its induced dual airflow keeps conditions uniform, and the ABS construction makes cleaning straightforward. The unit’s automatic turning and large viewingwindowreduce handling and let you monitor progress without opening the lid.
Who benefits most? Families running several hatches per year, users who need tight calibration, and anyone who prefers near hands-off incubation.
Manna Pro Nurture Right 360 — value with automation
The Nurture Right 360 holds about 22 eggs and includes an automatic turner that stops before lockdown. It uses induced airflow and a clear lid for 360-degree visibility. Humidity is typically managed manually, with an external water fill that lowers lid openings.
Trade-off: Choose the Brinsea for maximum control and lower humidity work. Pick the Nurture Right for a popular, capable model that cuts turning chores and keeps monitoring simple.
Best small incubators for chicken eggs in tight spaces

Small hatches need compact gear that keeps conditions steady without taking over a room. These units are ideal for apartments, small utility rooms, classrooms, or first-time keepers who want to hatch chicks without dedicating much space.
Brinsea Mini II EX — small but automated. This forced-air model packs a digital thermostat, automatic humidity control, and an automatic turner into a roughly seven-egg capacity unit. Its easy viewing window cuts lid openings and lets you monitor progress in a tiny chamber.
Why it matters: automatic humidity helps stabilize moisture in small enclosures where room conditions can swing. That makes the Mini II EX travel-friendly and well suited to short runs of replacement pullets or classroom projects.
Brinsea Mini II Advance — lower-cost Brinsea with manual water management
The Advance keeps digital temperature control and the automatic turner but trades automatic humidity for manual topping. You get Brinsea reliability and turning automation at a lower price, while accepting more hands-on humidity checks.
- Choose EX when you want top automation and stable hatch conditions during travel or variable rooms.
- Choose Advance when you want Brinsea build quality and automatic turning at a reduced price.
Note: small capacity means slower flock growth. If you plan rapid expansion, consider medium-size units to reach your next level faster.
Best budget small egg incubator for beginners

A low-cost 12-egg unit can teach the basics of incubation without overwhelming a new keeper.
KEBONNIXS 12-egg is a budget forced-air unit with a digital display and automatic turning. It relies on manual humidity, so you must monitor water levels and add water on schedule. Some models include an external water-fill option that reduces lid openings and helps keep humidity steady.
Expect solid hatch potential, but plan extra verification. Built-in sensors on low-cost units can drift. Cross-check readings before you set eggs and again during the run.
What to add for accuracy | Best Incubator for Chicken Eggs
Place one thermometer at egg height and a second as a backup. Use two mini hygrometers spaced near the tray to spot a bad sensor early. These small tools help protect your chicks and your effort.
| Feature | Why it matters | Quick tip |
|---|---|---|
| 12-egg capacity | Matches a typical purchase or daily collection | Start with one full tray to learn routines |
| Manual humidity | Requires scheduled water top-offs | Use external fill if available to avoid opening lid |
| Accuracy add-ons | Reduces risk from a single bad sensor | Place devices at egg height and run a 24-hour test |
- Beginner checklist: run the unit 24 hours empty, verify temperature and humidity, then adjust slowly rather than chasing numbers.
- Use extra thermometers and two hygrometers to confirm readings and protect hatch rates.
Best medium incubators for family hatches and backyard flock growth

Medium-sized units hit the balance between capacity and hands-on time that most families need.
Brinsea Ovation 28 EX — repeatable results batch after batch
Why it stands out: highly consistent temperature and humidity control and easy sanitation between runs. That repeatability helps keep hatch outcomes steady over many cycles.
Manna Pro Nurture Right 360 — visibility and community support
Why people choose it: a 360-degree viewing window and a popular ecosystem of tips and parts. It has an automatic turner that stops before lockdown.
Realistic note: some users report higher noise and a limited built-in candler, so an external candler can improve egg monitoring.
Chickcozy — quieter budget performance | Best Incubator for Chicken Eggs
Why consider it: quieter operation, an external water tray to top off humidity without opening the lid, a large window, and solid reported hatch outcomes (home reports like 9/11 hatched).
- Pick Brinsea for highest automation and precision.
- Pick Nurture Right 360 for visibility, value, and community resources.
- Pick Chickcozy when noise and budget matter but decent hatch results are still a priority.
Best large incubators for scaling up your flock

Growing a flock rapidly brings new demands: capacity, consistent control, and easier sanitation.
Scaling up usually means hatching more eggs per run to save time and cost. This suits 4-H projects, community sales, or backyard keepers who want fewer batches but larger yields.
Brinsea Ovation 56 EX — higher capacity with fully automatic control
Why this model matters: It gives large capacity combined with fully automatic humidity control and an automatic turning system. Induced dual airflow helps keep temperature even across the tray, which reduces uneven development when many eggs share one chamber.
ABS plastic construction makes cleaning faster and reduces lingering pathogens compared with porous materials. At scale, a single loss can be costly, so automated control and easy sanitation save time and protect hatch outcomes.
HovaBator Genesis 1588 — classic large-capacity budget trade-off
Value notes: This model can hatch a lot of chicks at a low price, but it often uses foam components that need extra care. Foam is harder to sanitize well and can harbor microbes.
Expect to run more calibration checks with extra thermometers and hygrometers and to schedule deeper cleaning between batches. If you accept more hands-on monitoring, the cost-per-chick can be attractive.
- Airflow & temperature: As capacity grows, hotspots matter more. Induced airflow and stable control reduce variance across many eggs.
- Material trade-off: Plastic (ABS) cleans easier; foam needs more attention to keep disease risk low.
- Who should choose which: Pick Brinsea when you want repeatable hatches with minimal babysitting. Choose HovaBator when budget limits are tight and you can commit to extra monitoring and sanitation.
Spotlight review: Nurture Right 360 features that help a successful hatch

This spotlight breaks the Nurture Right 360 down into the practical ways its features lower risk and simplify incubation. Each design choice targets common failure points: uneven air, lost humidity, missed turns, and unnecessary lid openings.
360-degree induced air flow and why it reduces hot spots | Best Incubator for Chicken Eggs
Induced airflow keeps warm air moving around the chamber so temperature and humidity spread evenly. That reduces hot spots that cause staggered development and uneven hatch timing. Even distribution helps embryos reach the same stage together, which supports a more predictable hatch.
Automatic egg turner and auto stop before lockdown
The built-in egg turner mimics natural turning and keeps yolks centered. It automatically stops before lockdown (about day 18), which removes a common beginner mistake—continuing to turn during the final critical days.
External water fill design to add water without lifting the lid | Best Incubator for Chicken Eggs
External water access lets you add water without opening the top. That reduces sudden humidity drops during late incubation and pipping, a practical way to protect hatch success when every percent of humidity matters.
Built-in candler strengths and limitations for monitoring egg development
The built-in candler is handy for quick checks and saves time. However, darker shells or deep-set yolks can be hard to read. Many users pair the model with a stronger handheld candler for clearer diagnostics.
Fit notes and turner tray compatibility considerations | Best Incubator for Chicken Eggs
Standard trays fit most chicken-sized egg sizes. Larger eggs—like duck or jumbo—may not seat correctly. Third-party larger-egg turner trays are available and avoid contact issues that can harm development.
Bottom line: the Nurture Right 360’s airflow, timed turning, and external water-fill reduce handling and fluctuations in temperature humidity. Those features combine to lower common errors and help a successful hatch with less fuss.
| Feature | Practical benefit | Quick user tip |
|---|---|---|
| Induced 360° air | Even temperature and humidity across the tray | Place thermometer at egg height to verify uniformity |
| Automatic egg turner (auto-stop) | Mimics natural turning and prevents late-cycle turning errors | Confirm turner stops at day 18 for lockdown |
| External water fill | Add water without opening lid; stabilizes late-stage humidity | Top off reservoir at scheduled checks to avoid drops |
| Built-in candler | Convenient quick checks | Use a handheld candler for dark-shelled eggs |
| Tray compatibility | Ensures proper fit for larger egg types | Buy larger-egg turner trays when hatching duck or jumbo eggs |
Brinsea Ovation series breakdown for different budgets and control levels

The Ovation line gives a clear upgrade path from a basic digital unit to a near hands-off solution. The series is offered in 28-egg and 56-egg sizes and keeps the same core platform across three levels.
Eco vs Advance vs EX: what you gain at each level | Best Incubator for Chicken Eggs
Eco is the baseline. It offers accurate digital temperature control, Brinsea alarms, and programmable turning. It suits users comfortable managing humidity manually.
Advance adds a humidity display and periodic cooling. That extra visibility helps breeders refine routines and spot trends before lockdown.
EX gives fully automatic humidity control. This reduces daily checks and lowers variability across runs.
When automatic humidity control is worth paying for | Best Incubator for Chicken Eggs
Automatic humidity control pays off in dry homes, busy schedules, and during travel. If you want more repeatable hatch outcomes and fewer mid-cycle adjustments, the EX level is a good choice.
Air movement, temperature consistency, and build quality
The line uses induced dual airflow to keep degrees uniform across trays. That steady air flow helps embryos develop evenly and improves hatch rates for many chicks.
| Level | Key gain | Best fit |
|---|---|---|
| Eco | Digital temp & alarms | Hands-on users |
| Advance | Humidity display & cooling | Process-focused keepers |
| EX | Fully automatic humidity | Busy or travel-prone owners |
Set up tips to protect hatch rates before incubation day

A smooth hatch begins long before day one; pre-checks matter most. Take time to test systems so that small early problems do not ruin a full run.
Run a 24-hour dry test. Power the unit and monitor temperature and degrees across one full day. Confirm the turner moves and that displays hold steady. This reveals drift and mechanical issues well before delicate eggs go in.
Cross-check sensors at egg height | Best Incubator for Chicken Eggs
Place at least two thermometers and two hygrometers at egg height, not on the lid. Built-in sensors can read differently than the air around eggs.
Average readings to catch bad sensors early, especially on budget models.
Room placement and environment control
Keep the unit away from direct sun, HVAC vents, exterior doors, and garages with big daily swings. Stable room conditions reduce the load on temperature and humidity control.
Test water reservoirs and vents during the dry run so humidity behavior is predictable when you start.
| Check | What to verify | Quick action |
|---|---|---|
| 24-hour run | Stable degrees and continuous turning | Fix drift or noisy parts before setting eggs |
| Sensor placement | Thermometers/hygrometers at egg height | Use averages from two devices to confirm readings |
| Room siting | Avoid sun, drafts, and HVAC swings | Move unit to a stable interior spot |
Operating tips during incubation and lockdown to avoid common failures

A simple operating rhythm reduces mistakes and protects developing embryos. Keep checks short, scheduled, and predictable so you do not disturb temperature or humidity repeatedly.
Turning schedule through day 18 and why the turner reduces risk
Turn eggs at least three times daily through day 18. During lockdown (the last three days) stop turning so embryos orient for pipping.
An egg turner prevents missed turns and cuts lid openings, which lowers temperature and humidity swings that stress embryos.
Managing humidity spikes and when to increase humidity for hatch time
Treat humidity as a trend: aim near 50–55% through day 17, then raise levels for hatch. Too high stops proper moisture loss; too low risks shrink-wrapping.
If you see a spike, wait and observe before you add water. Small adjustments avoid overcorrecting the chamber.
When and why to candle to remove non-developing eggs
Candle around day 10. Clear eggs or those with a red ring should be removed to prevent spoilage and protect viable eggs and chicks.
Handling the lid: minimizing air loss and stress
Plan checks, keep tools at hand, and work fast. Use external water-fill when available to top off humidity without opening the lid.
Rule of thumb: less intervention usually leads to a more successful hatch than frequent tinkering.
At The End of: Best Incubator for Chicken Eggs Guide
A clear buying order keeps decisions simple: prioritize steady air movement and tight temperature control, then look at humidity management. After that, add turning automation and comfort features like alarms and a viewing window.
Match the size of the unit to your flock goals—small units suit tight spaces, medium units fit family hatches, and larger models support scaling chickens responsibly. Run a 24-hour test and cross-check readings with spare thermometers and hygrometers before you set any eggs.
Plan the full incubation cycle from day 1 to day 21: lockdown behavior, water refills, and minimal lid openings matter. Realistic hatch expectations and rooster odds help determine how many eggs to set if you want a specific number of hens.
Next step: pick the model that fits your budget and time, follow the setup tips, and use consistent routines to protect hatch outcomes and healthy chicks.
FAQ
What matters most for high hatch rates when hatching chicks at home?
Stable temperature and consistent airflow top the list. Keep a steady temp (within a degree) and use forced-air circulation to avoid hot or cold spots. Proper humidity to control moisture loss, timely egg turning through day 18, and good sanitation also make a big difference.
Which is better: forced-air or still-air models, and why does airflow consistency matter?
Forced-air designs circulate air to keep temperature uniform across trays. That consistency prevents localized overheating or cooling that can kill embryos. Still-air units can work but require careful monitoring and more frequent adjustments.
How precise does temperature need to be during incubation?
Aim to hold temperature within about ±1 degree F of the target. Even small, sustained deviations can slow development or reduce hatch rates, so verify with independent thermometers at egg level.
How do I manage humidity and why does moisture loss matter?
Track both incubator humidity and weight loss of eggs. Low humidity causes excess moisture loss and failed pips; high humidity can lead to weak chicks. Use a hygrometer and add water as needed, especially during lockdown days before hatch.
Should I use an automatic egg turner or turn eggs manually during the first days?
Automatic turners reduce human error and maintain a consistent schedule until day 18, when turning stops. Manual turning works if you follow a strict schedule (at least 3–5 times daily) and mark eggs to track rotation.
How many eggs can I realistically hatch and what hatch rate should I expect?
Expect 60–85% hatch rates with fertile, well-handled eggs. Capacity planning depends on tray layout and flock goals; smaller units suit occasional hatches, while larger trays help scale up a backyard flock.
How important is easy cleaning and durable materials?
Critical. Smooth, nonporous surfaces and removable trays simplify disinfection between batches. Avoid designs with many crevices that trap bacteria and make sanitation time-consuming.
Are viewing windows useful or just cosmetic?
A clear window helps you monitor without opening the unit and disturbing temperature and humidity. It’s practical if you frequently check eggs, but avoid constantly peeking during lockdown.
Do alarms and digital displays matter for successful hatches?
Yes. Audible alarms for temperature or humidity drift let you intervene fast. Clear digital readouts make settings and adjustments easier, reducing guesswork during a multiweek hatch.
How did you choose products for this roundup in the United States?
Selection emphasized control precision, reliable airflow, automatic turning, humidity management, build quality, and user feedback. Ease of setup and after-sales support also guided picks.
What does “set it and forget it” really mean for time, travel, and consistency?
It means the unit holds stable temperature and humidity with minimal daily adjustments, uses an automatic turner, and has alarms so you can step away for short trips without compromising the hatch.
Why is the Nurture Right 360 often recommended as a value option?
It offers 360-degree airflow to reduce hot spots, an automatic turner with auto-stop before lockdown, and an external water-fill that lets you add water without opening the lid—features that simplify care and raise hatch odds.
What should I know about Brinsea Ovation models as a precision choice?
Brinsea Ovation units deliver tight temp control, optional automatic humidity, and reliable automation for repeatable results. Higher-tier models add features that help when incubating larger batches or mixed egg sizes.
Which small models work well in tight spaces and what trade-offs exist?
Compact units like the Brinsea Mini II models provide reliable temp control in a smaller footprint. Trade-offs include lower capacity and sometimes manual humidity control on budget versions.
What should beginners add to improve accuracy on a budget unit?
Use an extra digital thermometer and a standalone hygrometer placed at egg level. Calibrate sensors, run the unit 24 hours before setting eggs, and practice a turning routine if no automatic turner is included.
For medium or larger hatches, which features make the biggest difference?
Automatic humidity control, robust forced-air circulation, a reliable auto-turning mechanism, and a design that’s easy to clean all help maintain consistent conditions across larger batches.
When is automatic humidity control worth the extra cost?
If you hatch frequently, run mixed-species batches, or live where indoor humidity swings widely, automatic humidity control reduces manual interventions and improves hatch consistency.
What are setup steps to protect hatch rates before day 0?
Run the unit for at least 24 hours to confirm stable temperature and humidity at egg level. Cross-check readings with separate thermometers and hygrometers, place the unit away from drafts and direct sun, and clean the chamber before loading eggs.
What operating tips help during incubation and lockdown?
Maintain consistent turning until day 18, monitor humidity and increase it during the final 48–72 hours to ease pipping, candle around day 7–10 to remove clear or dead eggs, and avoid opening the lid during lockdown.
How does the Nurture Right 360’s external water fill help during incubation?
External water fill lets you add water without lifting the lid, preventing sudden humidity and temperature drops that stress embryos—particularly useful during critical late-stage development.
Are built-in candlers useful and what are their limits?
Built-in candlers help inspect development, but their light may be weaker than a separate candler. Use them for quick checks, but rely on a dedicated candler for detailed assessment of early embryos.
How should I handle eggs and the lid to minimize embryo stress?
Handle eggs gently, avoid sudden temperature changes, and limit lid openings. When you must open the unit, do it quickly and only when necessary to keep humidity and temp stable.
What accessories improve hatch success and monitoring?
Extra thermometers, a calibrated hygrometer, an egg candler, and a small notebook or app log to track temp, humidity, and turning schedule will boost consistency and troubleshooting ability.
Conclusion of: Best Incubator for Chicken Eggs
Who this buying guide is for
If you already understand the basics of incubation (temperature, humidity, turning, and troubleshooting) from your pillar guide, this page is for choosing hardware—not re-learning the process—and it focuses on picking the best incubator for chicken eggs based on reliability, cleanliness, and fit for your flock size. In the U.S., your best choice depends less on “brand hype” and more on how stable your room is, how often you hatch, and how easily you can keep the unit sanitary between hatches. This guide shows exactly what to buy (features and specs) so your setup supports strong hatch rates from day one. OSU Poultry Team: Choosing an Incubator
Define “best” for your hatch goals
The best incubator for chicken eggs is the one that matches your goals with the fewest “unforced errors” built into the design—meaning it holds steady conditions with minimal babysitting, stays clean without drama, and fits your batch size without crowding. A weekend backyard hatch for a few pullets has a different “best” than a small breeder who sets eggs monthly and needs repeatable results. Before you compare models, write down your target batch size, how many hatches per year you’ll run, who will operate it (you, family, 4-H kids), and what happens if the power blips. Ohio 4-H: Choosing an Incubator (PDF)
Capacity planning for U.S. flock sizes
To choose the best incubator for chicken eggs, start with capacity planning that reflects how Americans actually manage small flocks: many backyard keepers hatch in waves (replacement layers, meat birds, or a spring hatch) while homesteads and micro-farms may hatch more often to keep a steady pipeline. Pick a rated egg capacity that gives you headroom, because cramming trays edge-to-edge can reduce uniformity and make cleaning harder between cycles. A practical rule is to buy one size up from your “typical” set so you can stagger batches or drop in a few extra eggs without turning the chamber into a crowded box. N.C. Cooperative Extension: 4-H Embryology Quickstart Guide (PDF)
Forced-air vs still-air: the decision that matters most
For most people chasing consistently high hatch rates, the best incubator for chicken eggs is usually forced-air (fan-circulated) because it reduces temperature layering and recovers faster after quick lid openings. Still-air units can work, but they demand tighter discipline on placement, level, and monitoring—small inconsistencies become big differences across the tray. If you hatch in a typical U.S. home where rooms warm up and cool down with HVAC cycles, a forced-air design is more forgiving and tends to produce more uniform results across the chamber. University of Maine Extension: Hatching Your Own Chicks
Temperature control hardware worth paying for
When you’re shopping for the best incubator for chicken eggs, pay for stability and control quality more than flashy screens: look for a responsive heating system, an accurate thermostat/controller, and a design that minimizes overshoot and “yo-yo” cycling. Units that rapidly swing high/low can silently reduce outcomes even if the average reading looks fine. Also check where the sensor sits and whether airflow is designed to keep conditions consistent at egg height, because that’s where performance matters, not at the lid. Mississippi State University Extension: Important Incubation Factors
How to verify claims about accuracy
Marketing claims are cheap, so the best incubator for chicken eggs is the one you can verify with a simple test run before you ever set a valuable batch. Plan a 24–48 hour “dry run” and compare the built-in reading to a separate, known-good thermometer placed at egg level, then repeat after the unit has fully warmed and stabilized. If the built-in display can’t match a reference within a tight window—or it drifts when your room temperature changes—treat that as a real risk, not a minor annoyance. NIST: Industrial Thermometer Calibrations
Humidity management features that save hatch rates
The best incubator for chicken eggs makes humidity management simple without constant lid lifting, because every unnecessary opening can disrupt conditions and introduce contamination. Look for designs with accessible water channels or external fill options, a reservoir that’s easy to clean, and enough surface area control that you can adjust moisture without improvising. Clear visibility of water level is a practical “buying” feature, and so is a layout that lets you add water quickly—especially in dry winter climates or heated homes where air can be very dry. Oklahoma State University Extension: Artificial Incubation
Humidity sensor reliability and drift
If you’re choosing the best incubator for chicken eggs with an eye on repeatable results, treat humidity sensors like any other measurement device: they can drift, especially in warm, moist environments, and low-quality sensors can mislead you over time. A “better” incubator either uses higher-quality sensing, allows easy replacement, or supports verification using simple cross-check methods so you’re not trusting a single cheap probe forever. For serious hobby breeders, 4-H programs, or small farms, buying for measurement reliability is often smarter than buying for extra capacity you won’t use. NIST: Humidity
Turning systems and tray design
Because turning is a mechanical job, the best incubator for chicken eggs often includes a robust automatic turner (or supports one) that’s easy to remove, clean, and re-install without bending parts or misaligning gears. When you compare units, inspect how the turner is driven (simple, sturdy mechanisms usually outlast complicated ones), how smoothly trays move, and whether the design keeps eggs secure without pinching or jostling. Also consider whether you can pull trays quickly for cleaning, because the “best” unit is one you’ll actually sanitize properly between cycles. Texas A&M AgriLife Extension: Incubating and Hatching Eggs (PDF)
Tray flexibility and egg handling
In the real world, the best incubator for chicken eggs is often the one that handles variation—slightly different egg sizes, occasional small or large eggs, and the way people actually load trays when they’re collecting over several days. Look for adjustable rails or interchangeable trays so eggs sit securely and consistently rather than rolling, leaning, or touching in ways that make cleaning harder. If you ever plan to hatch other poultry, tray flexibility becomes an even bigger deal, so choose a platform that can adapt instead of forcing you to buy another machine. Utah State University Extension: Hatching and Caring for Chicks (PDF)
One incubator or incubator plus hatcher
If you hatch regularly, the best incubator for chicken eggs may be a setup strategy rather than a single box: many repeat hatchers prefer separating “incubation” from “hatching” to keep debris, moisture spikes, and fluff away from clean trays. In small hatch spaces, a separate hatcher (or at least a removable hatching tray and a design that cleans fast) reduces cross-contamination risk and makes your workflow easier. Even if you buy one combined unit, prioritize models that make the hatch phase removable and washable rather than permanently built-in. Texas A&M AgriLife: Incubating and Hatching Eggs (PDF)
Ventilation, placement, and room conditions
Many people blame the machine when the real issue is the room, so the best incubator for chicken eggs is one you can place in a stable, draft-free area with consistent indoor conditions. Look for adjustable vents and a design that can exchange air without becoming overly sensitive to drafts, direct sunlight, or cold walls. In the U.S., avoid garages that swing hot/cold daily and avoid spots near exterior doors; a quiet interior room or well-ventilated basement space is often the most consistent environment for repeatable performance. Illinois Extension: Operating a Still Air Model Incubator
Build quality and insulation in real U.S. climates
In hot, humid regions and cold winter states alike, the best incubator for chicken eggs benefits from good insulation, a lid that seals well, and materials that don’t warp or leak heat when the room changes. Better insulation reduces how hard the heater has to work, which often means fewer swings and faster recovery after brief access. Also pay attention to condensation management: visibility is nice, but constant fogging or dripping can signal poor airflow or cold surfaces, and that can complicate sanitation and monitoring. University of Nebraska–Lincoln Extension: Incubation Guidelines (PDF)
Cleanability and biosecurity in small hatch spaces
For long-term success, the best incubator for chicken eggs is the one you can thoroughly clean—quickly—without needing special tools or guessing where residue hides. Favor smooth plastic interiors, removable trays, minimal seams, and parts that can be washed and dried completely before the next set. Avoid designs with exposed foam, tight crevices, or permanently attached components that trap moisture and organic material, because those features turn “easy hatching” into “hard sanitation” after a few cycles. University of Missouri Extension: Incubator Cleaning and Disinfecting (PDF)
Egg sanitation buying considerations
If you’re investing in the best incubator for chicken eggs, remember the machine is not a miracle-worker for dirty eggs: sanitation starts before eggs ever enter the chamber, and your incubator should support that reality. Choose a unit that can be disinfected without damaging components and that allows full drying between sets, because damp corners and leftover debris can become an ongoing problem. If you collect eggs on litter floors or buy shipped hatching eggs, prioritize a design that makes sanitation and separation easy so you’re not constantly fighting contamination pressure. UC ANR: Hatching Egg Sanitation (PDF)
NPIP, sourcing, and what incubators can’t fix
For buyers and sellers, the best incubator for chicken eggs pairs with good sourcing and records—especially if you purchase hatching eggs, sell chicks, or exchange birds across state lines where health and documentation expectations may matter. If you’re buying eggs, look for credible sourcing practices (often tied to NPIP participation) and keep basic hatch records, because fertility, egg handling, and sanitation can limit results no matter how advanced the machine is. A solid incubator helps you control your part of the equation, but it can’t reverse poor egg quality upstream. USDA APHIS: NPIP Reference Guide
Workflow biosecurity in the hatch area
Even at backyard scale, the best incubator for chicken eggs is easier to manage when your hatch area follows simple “clean to dirty” workflow: store eggs cleanly, handle the incubator with clean hands, and keep chick fluff and hatch debris away from your next set. Look for incubators that support this workflow with removable parts and easy wipe-down surfaces, and consider whether your space allows separate zones for egg staging, incubation, and cleaning. These habits matter more in the U.S. during periods of heightened avian influenza awareness, when many poultry owners tighten routine biosecurity. USU Extension: Hatchery Sanitation and Biosecurity (PDF)
Power reliability and backup planning
Because outages happen—from Gulf Coast storms to Midwest ice events—the best incubator for chicken eggs is the one you can keep stable through short disruptions without panic. Before you buy, decide what your backup plan is: surge protection for electronics, a small UPS to ride through brief blips, or a battery/inverter or generator strategy for longer events if you hatch often. Also consider designs with better thermal retention, because insulation buys you time when power is unstable, especially in unsteady rural electric service areas. Illinois Extension: Incubation and Embryology (PDF)
Monitoring, alarms, and recordkeeping
If you want repeatable outcomes, the best incubator for chicken eggs is usually one that helps you notice problems early: clear displays, easy-to-read trends, and alarms that matter (power loss, out-of-range conditions) rather than constant noisy notifications. Remote monitoring can be helpful, but simple recordkeeping often improves results more—especially if multiple people share responsibilities in a family, classroom, or 4-H setting. Choose a system you’ll actually use daily, and keep a consistent log so you can compare batches and catch “drift” before it costs you a full hatch. Ohio State University Extension: Chick Incubation Guide (PDF)
A simple decision matrix to compare models
To pick the best incubator for chicken eggs without getting lost in marketing, score each model on the same categories: stability of control (highest weight), cleanability (next), turning system reliability, airflow/venting, and how well the design fits your space and workflow. Then add “ownership factors” like parts availability, warranty clarity, and whether the unit is easy to test-run and calibrate before setting eggs. This method prevents you from overpaying for bells and whistles while missing the fundamentals that actually protect hatch performance. Virginia Tech Extension: Beginning of Life (PDF)
Pre-purchase test run and calibration
Once you narrow candidates, the best incubator for chicken eggs should pass a real test-run: run it empty, confirm readings at egg level, and check that it returns to stable conditions after quick access. If a unit can’t hold steady without constant manual correction, it will punish you later when life gets busy. Also plan for ongoing verification—every serious hatch setup benefits from at least one reference measurement device and a simple routine to confirm your system is still reading correctly. NIST: Thermometer Calibration Guidance (PDF)
Quick checklist
Use this quick list to shortlist the best incubator for chicken eggs for your specific situation, then test your top choice before you commit a valuable batch. N.C. Cooperative Extension: Setting Up an Incubator
- Choose forced-air if you want more uniform conditions with less babysitting.
- Buy one capacity size larger than your typical set for headroom and workflow flexibility.
- Confirm the unit supports an automatic turner (included or compatible) and is easy to remove.
- Look for accessible water fill and a reservoir you can fully clean and dry.
- Prefer smooth, washable surfaces with removable trays and minimal seams.
- Check that vents are adjustable and the design exchanges air without drafts.
- Verify warranty terms and the availability of replacement parts (fan, heater, sensor).
- Plan a surge protector and a realistic backup strategy for your local outage risk.
- Make sure you can place it in a stable indoor room away from sunlight and exterior doors.
- Commit to a 24–48 hour dry run and compare readings to a reference device.
Common mistakes to avoid
These are the buying and setup mistakes that prevent people from getting the best incubator for chicken eggs results even when they purchase a decent unit, so avoid them before they cost you a hatch. Mississippi State University Extension: Sanitation of Hatching Eggs
- Buying based on capacity alone and ignoring stability, airflow, and cleanability.
- Setting the incubator in a garage, sunlit window, or drafty hallway where conditions swing daily.
- Trusting built-in readings without a dry run and a reference thermometer/humidity check.
- Choosing a model that’s hard to disassemble, leading to incomplete cleaning between hatches.
- Overcomplicating features you won’t use while skipping reliable turning or solid ventilation.
- Assuming the machine can “fix” dirty eggs, poor fertility, or bad handling during storage/shipping.
- Ignoring power protection and losing a hatch during a predictable local outage season.
- Running multiple batches without a simple recordkeeping system, making problems hard to diagnose.
Costs and ROI snapshot
In the U.S. market, the best incubator for chicken eggs usually falls into three practical tiers: entry tabletop units (often fine for occasional small hatches), mid-range forced-air units with stronger controls and easier sanitation, and larger cabinet-style systems for repeat hatchers or small farms. Your real cost isn’t just purchase price—it’s the combination of stability, ease of cleaning, and how many hatches you’ll run per year. If you hatch often, paying more for reliability can reduce losses that would otherwise erase “savings.” Mississippi State University Extension: Reproduction & Incubation
Ongoing ownership costs for the best incubator for chicken eggs typically include electricity, replacement wear parts (fans, heaters, turner components), measurement verification tools, and sanitation supplies, plus the time cost of cleaning between sets. If you operate in a shared barn or mixed-animal space, sanitation time rises because you’ll need stricter cleaning and disinfection routines to reduce pathogen risk. Budgeting for maintenance—rather than hoping nothing ever breaks—is a practical approach that keeps performance stable across seasons. USDA APHIS: NAHEMS Cleaning and Disinfection Guidelines (PDF)
Biosecurity is a real “cost driver” when you hatch repeatedly, so the best incubator for chicken eggs is one that supports consistent cleaning and separation of clean/dirty zones in your workflow, especially when avian influenza awareness is high. The financial risk isn’t hypothetical: a contaminated hatch space can reduce chick quality and force you to discard equipment or pause hatching until sanitation is under control. If you sell birds or move them off-farm, the value of documented, repeatable sanitation increases because it protects your reputation and reduces preventable losses. USDA APHIS: Secure Egg Supply Cleaning & Disinfection Supplement (PDF)
ROI is easiest to see when you compare what you spend to hatch versus what you’d spend to buy day-old chicks or started pullets locally, but the best incubator for chicken eggs only “pays back” if your process is repeatable and your eggs are high quality. Use a conservative planning mindset: assume some losses, price in time spent cleaning and monitoring, and value the learning curve for the first few cycles. For small farms and breeders, reliable outcomes and predictable scheduling can matter as much as pure dollar savings, especially when you time hatches to pasture rotation or customer pickup windows. Kansas State University Extension: Incubation and Reproduction
Final thought
The best incubator for chicken eggs is ultimately the one that matches your hatch frequency, room stability, sanitation habits, and backup plan—because consistent workflow beats fancy features over the long run. If you buy for stability, cleanability, and verification (not just capacity), you’ll get more predictable outcomes and fewer stressful surprises as your hatching routine grows. Poultry Biosecurity: Information Manual (PDF)
Sources & References
- Mississippi State University: Care and Incubation of Hatching Eggs (PDF)
- Mississippi State University: Trouble Shooting Failures with Egg Incubation (PDF)
- Mississippi State University Extension: Fumigation and Sanitation of Hatching Eggs
- Mississippi State University Extension: Hatching Egg Storage Period
- NPIP: Program Standards (PDF)
- NPIP: Best Management Practices for Hatcheries (PDF)
- USDA APHIS NVAP: Cleaning and Disinfection
- NIST: Hygrometers
- NIST: Calibration of Hygrometers with the Hybrid Humidity Generator
- NIST SP 250-83: Calibration of Hygrometers (PDF)
- University of Missouri Extension: Incubation of Poultry
- UC ANR: The Science of Incubation (PDF)
- University of Connecticut: Poultry Extension Helpful Hints for Teachers
- Texas A&M AgriLife Extension: Hatching Eggs in the Classroom (PDF)
- Federal Register: National Poultry Improvement Plan and Auxiliary Provisions


